You can
create up to 10 user accounts and restrict access to control panel
features separately for each one.
Access
Web Config and select the Product
Security tab. You see a window like this:
Select the Enables Access Control checkbox.
If you have configured the product for
an LDAP server or IEEE 802.1x network, you can
deselect the Allows printing and scanning
without authentication information checkbox to prevent the
product from receiving jobs sent from these sources:
The default operating system driver
A PCL or PostScript printer driver
Web services such as Epson Connect or Google Cloud Print
Smartphones and other mobile devices
Click OK.
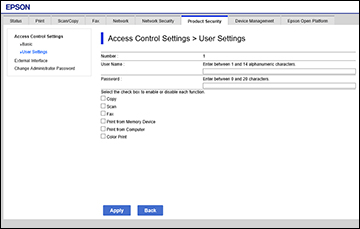
Select User
Settings.
Click Add. You see a window like this:
Enter a name for a user in the User
Name field following the guidelines on the screen. Use ASCII
(0x20-0x7E) characters.
Enter a password for the user in the
Password field following the guidelines on the screen.
Note: If you need
to reset a password, leave the password field blank.
Select the checkbox for each function
you want the user to be able to perform, and deselect the checkbox
for each function you want to restrict access to.
Click Apply.
Note: When you
edit a completed user account, you see a Delete option. Click it to delete a user, if
necessary.
Note: You can
import and export a list of user features using EpsonNet Config.
See the help utility in the software for instructions.