If
you cannot install the projector directly in front of the screen,
you can adjust the position of the projected image using the lens
shift feature (PowerLite
L510U/L610/L610U/L610W/L615U).
Follow these guidelines when using lens shift to
adjust your images:
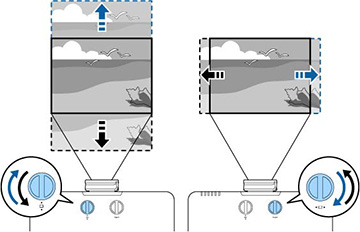
- When adjusting the image height, position the image lower than where you want it to be and then move it up using the vertical lens shift dial. This helps prevent the image from moving down after adjustment.
- Keep the vertical and horizontal lens shift dials in their center positions for the clearest picture.
Note: Wait 20
minutes after turning on the projector before setting the focus,
zoom, and lens shift for maximum accuracy.
- Turn on the projector and display an image.
-
Turn the vertical and
horizontal lens shift dials on the projector to adjust the position
of the projected image as necessary.
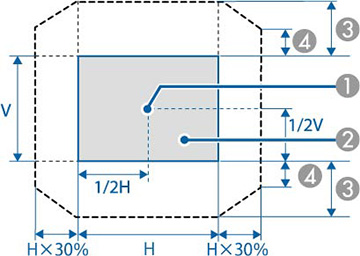
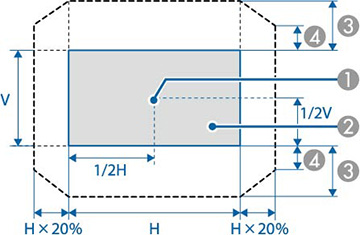
PowerLite L610
1 Center of lens 2 Projected image when the lens is set to the home position 3 Maximum range: V × 50% 4 When the horizontal direction is at the maximum value: V × 5% Note: You cannot move the image upward when the lens is shifted horizontally all the way.PowerLite L510U/L610U/L610W/L615U
1 Center of lens 2 Projected image when the lens is set to the home position 3 Maximum range: V × 50% 4 When the horizontal direction is at the maximum value: V × 12%


