You can
print one or more photos from a memory card in special layouts on
various sizes of photo paper.
Note: Photos
are placed automatically in the layout. If you want to manually
select where they appear in the layout, see the Printing Photos
with a Template topic instead.
- Load photo paper in your product.
- Insert a memory card into your product's memory card slot.
- Press the
 home icon, if necessary.
Note: If Auto Selection Mode is turned on in the Guide Functions menu, select to function index when you see the information screen.
home icon, if necessary.
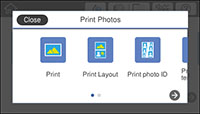
Note: If Auto Selection Mode is turned on in the Guide Functions menu, select to function index when you see the information screen. - Select Print Photos.
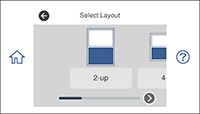
- Select Print Layout. You see this screen:
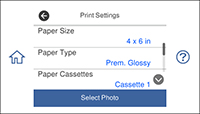
- Select one of the displayed layout options. You see this screen:
- Select your paper and print settings as necessary.
- Select Select Photo and select OK.
- Do one of the following to
select your photos:
- Select the thumbnail images of the photos you want to print. Each photo you select has a number on it to indicate the number of prints you selected.
- Select Single View, select the thumbnail of the photo you want to print, and press the left or right arrow buttons to scroll through and select additional photos. You can also select Tile View to return to the thumbnail image view and select additional photos.
- To select all photos, select the
 menu icon and select Select all photos.
- Select Preview and Print.
- If you need to edit a
photo, select Edit and then
select the photo you want to edit. You see an image like
this:
1 Adjusts the cropping area. You can move the cropping area or change the frame size by sliding the corner points. Press the Rotation button to rotate the frame. 2 Applies a sepia or monochrome filter to the photo. 3 Lets you make color and red-eye corrections, and adjust brightness, contrast, sharpness, and saturation if necessary. Note: Press the Correction On button to switch between Correction Off and Correction On. If Correction On is selected, any color corrections you make to a photo are displayed on the screen. If Correction Off is selected, any color corrections you make are not displayed on the screen but will be applied to your printouts. - Select Copies to change the number of copies as necessary.
- When you are ready to
print, select the Print
icon.
Note: To cancel printing, select Cancel and select Close to exit.