You can
print ID photos from a memory card. Two copies of one photo are
printed at different sizes onto this size photo paper: 4 × 6 inches
(102 × 152 mm).
- Load photo paper in your product.
- Insert a memory card into your product's memory card slot.
- Press the
 home icon, if necessary.
Note: If Auto Selection Mode is turned on in the Guide Functions menu, select to function index when you see the information screen.
home icon, if necessary.
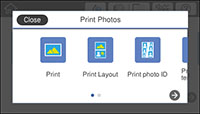
Note: If Auto Selection Mode is turned on in the Guide Functions menu, select to function index when you see the information screen. - Select Print Photos.
- Select Print photo ID and select OK. You see a screen like this:
- Select the photo you want to print.
- Select Print Settings and select your paper and print settings as necessary.
- Select Preview and Print.
- If you need to edit a
photo, select Edit and then
select the photo you want to edit. You see an image like
this:
1 Adjusts the cropping area. You can move the cropping area or change the frame size by sliding the corner points. Press the Rotation button to rotate the frame. 2 Applies a sepia or monochrome filter to the photo. 3 Lets you make color and red-eye corrections, and adjust brightness, contrast, sharpness, and saturation if necessary. Note: Press the Correction On button to switch between Correction Off and Correction On. If Correction On is selected, any color corrections you make to a photo are displayed on the screen. If Correction Off is selected, any color corrections you make are not displayed on the screen but will be applied to your printouts. - Select photo(s) to change the number of copies as necessary.
- When you are ready to
print, select the Print
icon.
Note: To cancel printing, select Cancel and select Close to exit.