- Turn off the product, and
unplug the power cord and any connected cables.
Warning: To avoid electric shock, make sure you unplug the power cord.
- Remove the optional paper cassette unit from its packaging and remove any protective materials.
- Do one of the
following:
- If your product has a single paper cassette and you are adding one additional cassette, go to step 8.
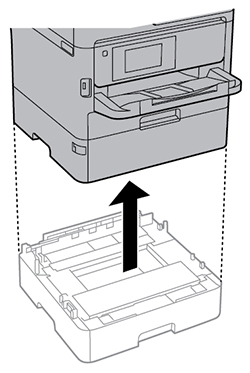
- If paper cassette 2 is already installed, uninstall it and continue to step 4.
- If your product has a single paper cassette and you are adding two additional cassettes, continue to step 4.
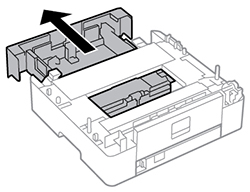
- Slightly pull the paper cassette tray out of paper cassette 2.
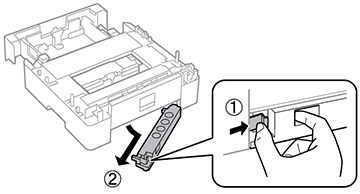
- Slide the tab as shown and remove the back part of paper cassette 2.
- Reinsert the paper cassette tray all the way back into paper cassette 2.
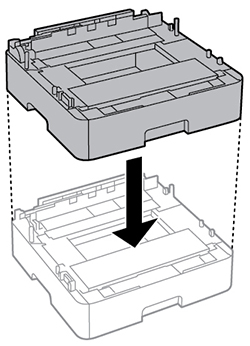
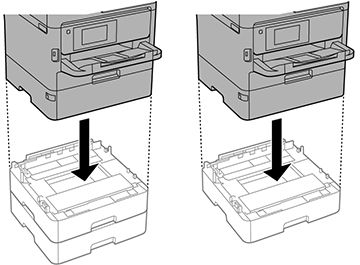
- Lower paper cassette 2 onto paper cassette 3 as shown.
- Do one of the
following:
- If you have two additional paper cassette units, lower the product onto paper cassettes 2 and 3.
- If you have one additional paper cassette unit, lower the product onto paper cassette 2.
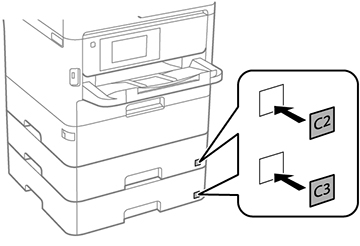
- Attach the included sticker(s) as necessary.
- Connect the power cord and other connection cables, then plug in the product.
- Turn on the product.
- Pull out and reinsert the paper cassette tray in the optional paper cassette unit and confirm that the cassette unit number is displayed on the screen.
- Enable the optional paper cassette unit in the printer software.