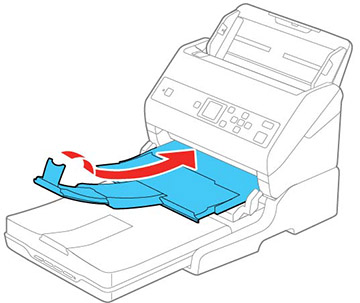
Scanning from the Docked Flatbed Scanner

You can place originals directly on the scanner glass of the flatbed scanner attached to the optional flatbed scanner dock.
Caution:
Make sure the scanner is placed on a flat surface. Do not place heavy objects on the scanner glass and do not press on the glass with too much force, or it may damage the scanner. Do not leave photos on the scanner glass for an extended period, or they may stick to the glass.
  1. Close the document scanner's output tray.


  2. Open the flatbed scanner cover.


  3. Place your original facedown on the scanner glass with the top edge facing as shown. Slide the original to the edges of the indicated corner.


    Note: Place your original 0.1 inch (2.5 mm) from the top and side edges of the scanner glass as shown in order to avoid cropping. If you are scanning multiple photos at once, place them at least 0.8 inch (20 mm) apart from each other.


  4. Close the flatbed scanner cover gently to keep your original in place. If you are scanning a book or other thick document, hold the scanner cover down as you scan.
  5. Start Document Capture Pro (Windows), Document Capture (Mac), or Epson Scan 2.
  6. Select Scanner Glass as the Document Source setting.
  7. Select other scan settings as necessary.
  8. Click Scan.