You can load
photo paper and other media in these sizes in the upper paper
cassette:
- 3.5 × 5 inches (89 × 127 mm)
- 4 × 6 inches (102 × 152 mm)
- 5 × 7 inches (127 × 178 mm)
- A6 (4.1 × 5.8 inches [105 × 148 mm])
Note: Do not
remove or insert the paper cassette while the product is
operating.
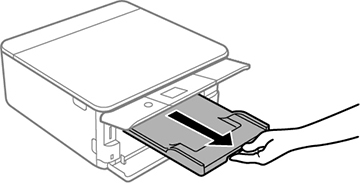
- Slide in the output tray.
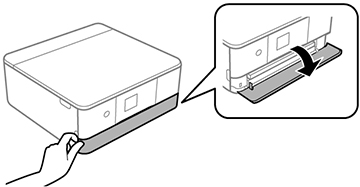
- Open the front cover until it clicks.
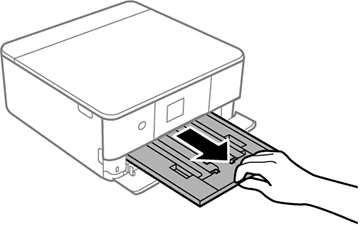
- Slide out the upper paper cassette (labeled 1 next to the cassette).
Note: If the cassette is too far inside the product to reach, turn the product off and on again. The cassette moves to the correct position.
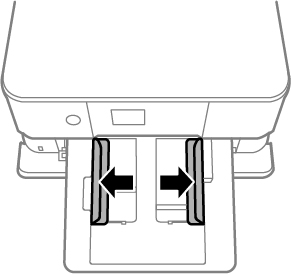
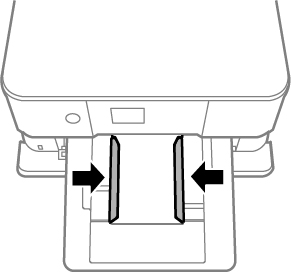
- Slide the edge guides outward.
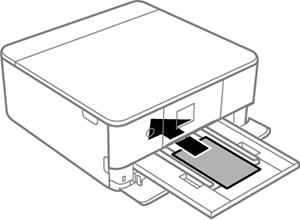
- Insert paper with the glossy or printable side facedown until it touches the back of the cassette.
- Slide the side edge guides against the paper, but not too
tightly.
Note: Make sure the paper is under the tabs on the edge guides.
- Slide the cassette into the product until the end of the
cassette is even with the front of the product. Keep the cassette
flat as you slide it.
Note: If you slide the cassette too far into the product, turn the product off and on again. The cassette moves to the correct position.
- Raise the control panel.
- Select the size and type
of the paper you loaded on the LCD screen, and select Close.
Note: You can quickly select frequently used paper settings by selecting Favorite Paper Settings.
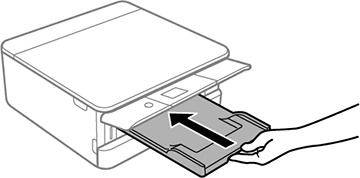
- Slide out the output tray.