You can
setup the product's basic fax settings using the Fax Setting
Wizard. This wizard is automatically displayed when the product is
turned on for the first time. You can also change these settings
individually from the Fax Settings menu.
- Press the
 home button, if
necessary.
home button, if
necessary. - Select Settings and press the OK button.
- Select Fax Settings and press the OK button.
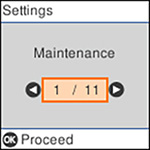
- Select Fax Setting Wizard and press the OK button. The Fax Setting Wizard screen appears.
- Press the OK button to proceed.
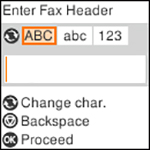
- On the Enter Fax Header screen, use the numeric keypad to enter the sender name for your fax source, such as your name or a business name, then press the OK button. You can enter up to 40 characters.
- On the Your Phone Number screen, use the numeric keypad to
enter your fax number, up to 20 characters.
Note: The name and phone number in the fax header identifies the source of the faxes you send.
- On the DRD Setting screen, do one of the following:
- If you have subscribed to a distinctive ring service from your telephone company, press the OK button. Select the ring pattern to be used for incoming faxes, press the OK button, and skip to step 12.
- If you have subscribed to a distinctive ring service from your telephone company, press the OK button. Select All and press the OK button.
- If you do not have a distinctive ring service, press the # button to skip.
Note: Distinctive ring services allow you to have several phone numbers on one phone line. Each number is assigned a different ring pattern. You can use one number for voice calls and another for fax calls. Select the ring pattern assigned to fax calls in the Distinctive Ring setting. If you select a ring pattern other than All, Receive Mode is automatically set to Auto. - On the Receive Mode Setting screen, confirm whether you are using a telephone connected to the product:
- Do one of the following:
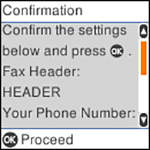
- On the confirmation screen, check the settings and press the OK button to proceed.
- On the Check Fax
Connection screen, press the OK button and follow the on-screen
instructions to check the fax connection and print a report of the
check result. If there are any errors reported, try the solutions
on the report and run the check again. If the Select Line
Type screen appears, select the correct line type.
If the option to disable dial tone detection appears, press the OK button. However, disabling the dial tone detection function may drop the first digit of a fax number and send the fax to the wrong number.
- Press the # button to exit the Fax Setting Wizard.