- Place your original photo on the scanner glass.
- Load the paper you want to print on.
- Press the
 home button, if
necessary.
home button, if
necessary.
- Select Various prints.
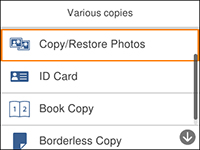
- Select Various copies. You see a screen like this:
- Select Copy/Restore Photos.
- Make sure the Restore Color setting is set to On.
- Select your other paper and print settings as necessary, then press the right arrow button.
- Select Start Scanning. Your originals are scanned and a preview appears on the LCD screen.
- If you need to edit the
copy, press the
 reset button and change any of these
settings as necessary:
reset button and change any of these
settings as necessary:
- Crop/Zoom: Zoom in and enlarge a part of the photo and crop it.
- Clear Edit: Resets your photo edits.
- To print more than one
copy, press the + or – buttons to increase or decrease the
number of copies.
Note: You can also select Copies and use the displayed numeric keypad to select the number of copies (up to 99).
- When you are ready to
copy, press the
 start button.