You can load
a single envelope or sheet of a variety of paper types and sizes
using the rear paper feed slot.
Note: Do not
load paper in the rear paper feed slot until prompted to do so.
Otherwise, the blank paper will be ejected.
- Do one of the
following:
- If you are printing from a computer, select Rear Paper Feed Slot as the Paper Source setting and click Print.
- If you are printing from the product's control panel, select Rear Paper Feed Slot as the Paper Source setting and press the Print or Copy icon.
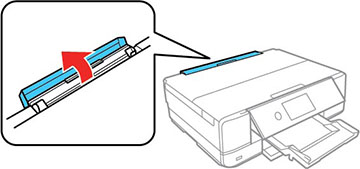
- Open the rear paper feed slot cover.
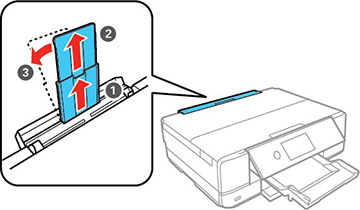
- Fully extend the paper support and tilt it back, as shown.
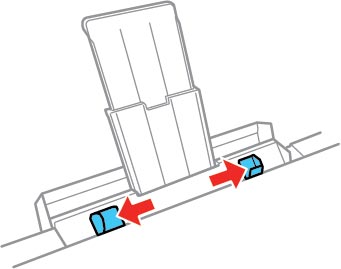
- Slide the edge guides outward
- Do one of the following:
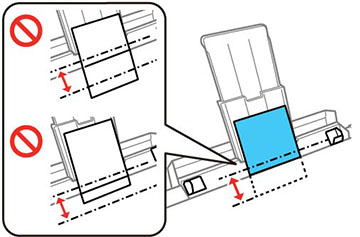
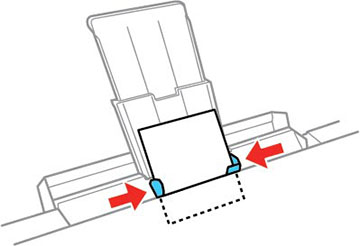
- Insert a
single sheet of paper, glossy or printable side up and short edge
first, centered at the arrow mark on the paper support. Insert the
paper approximately 2 inches (5 cm) into the slot.
Note: Legal (8.5 × 14 inches [216 × 356 mm]), B4 (13.9 × 9.84 inches [353 × 250 mm]), and user defined (3.5 × 5 inches to 11.7 × 47.2 inches [89 × 127 mm to 297 1200 mm]) paper sizes are only available when printing from a computer.
- Load an envelope printable side up and flap edge left, centered at the arrow mark on the paper support. Insert the envelope approximately 2 inches (5 cm) into the slot.
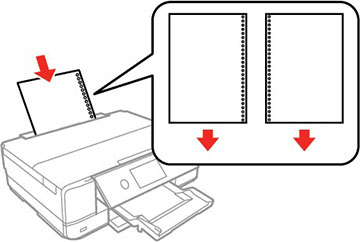
- Load a single sheet of loose-leaf or other paper with holes facing as shown, centered at the arrow mark on the paper support.
- Insert a
single sheet of paper, glossy or printable side up and short edge
first, centered at the arrow mark on the paper support. Insert the
paper approximately 2 inches (5 cm) into the slot.
- Slide the edge guides against the paper or envelope, but not too tightly.
- When you are ready to print, select Installed. The output tray extends automatically when you print.

Always follow
these paper loading guidelines:
- Load only one sheet at a time.
- Load paper short edge first, no matter which way your document faces.
- Load letterhead or pre-printed paper top edge first.
- Do not load an envelope that is curled, folded, or too thin, or that has a plastic window.
- Check the paper package for any additional loading instructions.