You
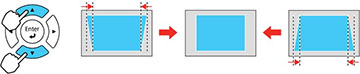
can use the projector's keystone correction buttons to correct the
shape of an image that is unevenly rectangular on the sides.
Note: You can
use the keystone buttons to correct the image up to ± 3°
horizontally or vertically.
Note: To
provide the best possible image quality, adjust the projector's
position to correct the image shape. Due to the
ultra-short throw characteristics of the projector, the projected
image is greatly affected by small movements. Adjust the
projector's position in small increments to square up the
image. If this isn't possible, use the keystone correction
buttons on the projector to correct the image shape.
Note: Wait 20
minutes after turning on the projector before setting the focus for
maximum accuracy.
-
Turn on the projector and display an
image.
Note: You can display a pattern to aid in adjusting the projected image using the Settings menu.
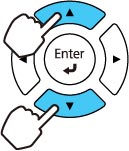
- Press one of these keystone buttons on the control panel to display the Keystone adjustment screen.
-
Press a keystone button on the projector's
control panel to adjust the image shape.
Vertical
Horizontal
After correction, your image is slightly smaller.Note: If the projector is installed out of reach, you can also correct the image shape with the remote control using the H/V-Keystone settings in the projector menus.