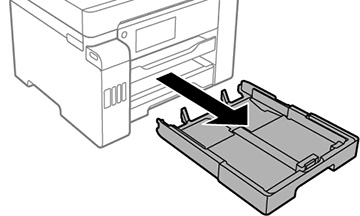
- Make sure the product is not operating and pull out the paper cassette.
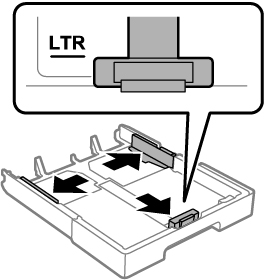
- Slide the side edge guides outward all the way, then slide the side front edge guide to the paper size you are using.
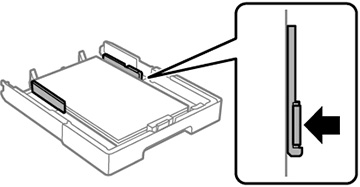
- Load paper with the printable side facedown.
- Slide the side edge guides
against the paper.
Caution:Make sure the paper fits beneath the arrow mark inside the edge guides.
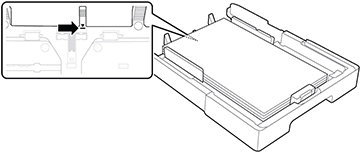
The paper must rest against the length guide. Make sure the paper does not go beyond the line indicated by the arrow below.
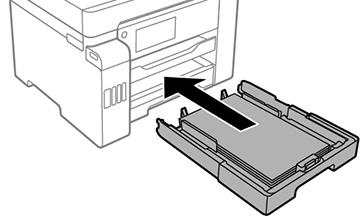
- Gently insert the paper cassette into the product to make sure the paper remains in place in the cassette. The paper should continue to rest against the length guide. If you use excessive force, the paper may shift in the cassette and cause a paper jam.
- Do one of the
following:
- Select the size and type of paper you loaded on the LCD screen.
- Press the
 Paper
Setting button, select the paper source, and
select the size and type of paper you loaded.
Paper
Setting button, select the paper source, and
select the size and type of paper you loaded. - Select Settings > General Settings > Printer Settings > Paper Source Settings > Paper Setting to select the size and type of paper you loaded.

Always follow
these paper loading guidelines:
- Load only the recommended number of sheets.
- Load only plain paper in cassette 2.
- Load paper short edge first, no matter which way your document faces.
- Load the printable side facedown.
- Load letterhead or pre-printed paper top edge first.
- Do not load paper above the line underneath the arrow mark inside the edge guides.
- Check the paper package for any additional loading instructions.
Note: When
printing on glossy photo papers, ink drying times increase
considerably (humidity, temperature, and other environmental
conditions can also affect photo drying times). To avoid smearing
your photos, do not touch the printed side until the ink is
completely dry. Moisture and oils from your skin can also affect
print quality, so avoid rubbing or scratching the surface of your
photos even after they dry.