When you see
the message Apply secondary carriage rod
grease on the LCD screen, you need to apply grease to
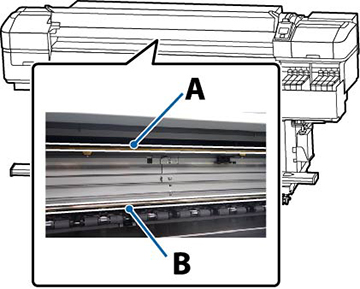
carriage rods A and B using the grease and tools that came with
your product. Use a new grease pad when applying grease to the
carriage rods.
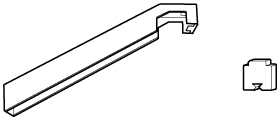
- To grease carriage rod A, locate the grease tool and pad A that came with your product.
- Press
the
 maintenance button. You see
the Maintenance menu.
maintenance button. You see
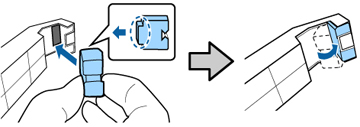
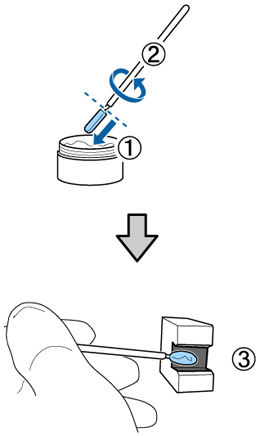
the Maintenance menu. - Firmly insert the tab on pad A into the slot on the grease tool and rotate the pad onto the tool as shown here.
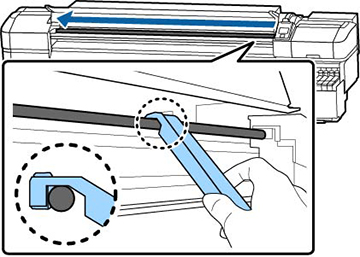
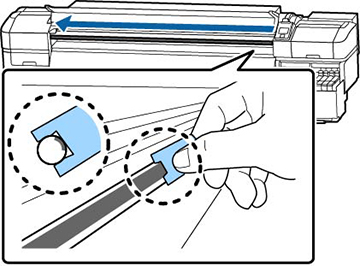
- Hold the grease tool against the back
of carriage rod A and smoothly slide it from right to left across
the carriage rod four times.
Caution:Do not slide the tool back and forth; dust may enter the print head and damage can occur.
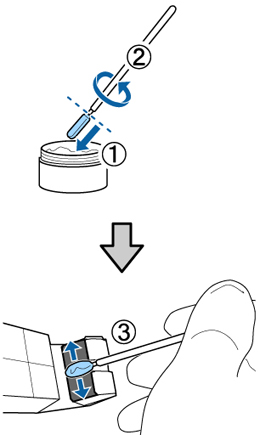
- Fully submerge the tip of the cleaning stick into the grease, rotate the stick two or three times, and remove it from the grease. Then apply the grease to pad A on the end of the grease tool.
- To grease carriage rod B, locate pad B that came with your product.
- Hold pad B against the front of
carriage rod B and smoothly slide it from right to left across the
carriage rod four times.
Caution:Do not slide the tool back and forth; dust may enter the print head and damage can occur.
- Fully submerge the tip of a cleaning stick into the grease, rotate the stick two or three times, and remove it from the grease. Then apply the grease to pad B.