If you see a message that paper has jammed inside the product, follow the steps here or on the LCD screen to clear the jam.
Take the following precautions when removing jammed paper from the product:
- Remove the jammed paper carefully. Using too much force may damage the product.
- Unless specifically instructed, avoid tilting the product, placing it on its side, or turning it upside down, as ink may spill.
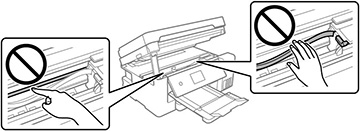
Warning:
Never touch the buttons on the control panel while your hand is
inside the product. If the product starts operating, it may cause
an injury. Do not touch any protruding parts inside the
product.
- Cancel the print job, if necessary.
- Open the paper tray (rear paper feed).
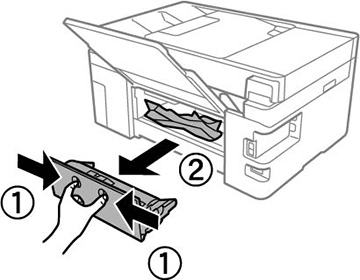
- Press the buttons to release the rear cover and remove the cover from your product.
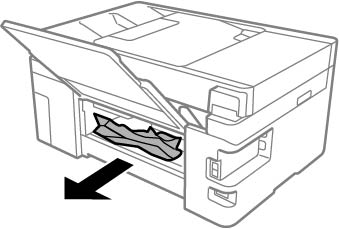
- Carefully remove any jammed paper from inside the product.
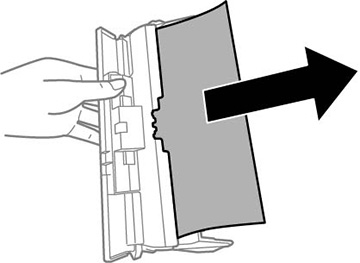
- Remove any jammed paper from the rear cover.
- Press the buttons and reattach the rear cover.
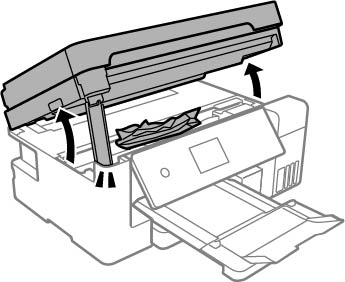
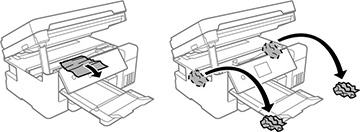
- Open the scanner unit as shown.
Note: Make sure the document cover is closed before opening the scanner unit.
- Carefully remove any jammed paper from inside the
product.
Caution:
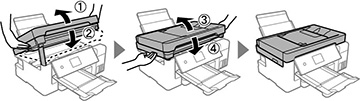
- Close the
scanner unit as shown.
Note: You must close the scanner completely before opening it again.
- Follow the prompts on the LCD screen to clear any error messages. If you still see a paper jam message, check the other paper jam solutions.