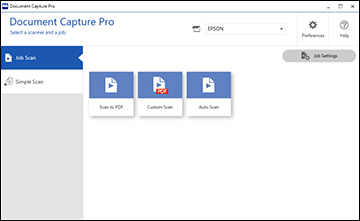
Scanning with Document Capture Pro

You can create scan jobs in Document Capture Pro and use them to quickly scan originals and save them to various destinations.
Note: The settings may vary, depending on the software version you are using. See the help information in Document Capture Pro for details.
  1. Load your original in the product.
  2. Do one of the following to start Document Capture Pro:
    • Windows 10: Click and select Epson Software > Document Capture Pro.
    • Windows 8.x: Navigate to the Apps screen and select Document Capture Pro.
    • Windows (other versions): Click or Start, and select All Programs or Programs. Select Epson Software > Document Capture Pro.
    You see the Document Capture Pro window. (You may see a screen asking you to select your scanner first; if you do, select your product.)
  3. Select the Job Scan tab. You see a window like this:


  4. Select one of the scan jobs (or click Job Settings to create a new scan job). The scanner scans the loaded originals and saves them according to the job settings.
  5. Depending on the job settings, you may be able to view and edit the pages before saving them. If so, click Complete when finished. The scanned images are saved according to the job settings.