You can
create scan jobs in Document Capture Pro and use them to quickly
scan originals and save them to various destinations.
Note: Settings may
vary depending on the software version you are using. Click the
Help icon in Document Capture Pro at
any time for more information.
- Do one
of the following to start Document Capture Pro:
- Windows 10: Click
 and select Epson Software > Document Capture Pro.
 - Windows 8.x: Navigate to the Apps screen and select Document Capture Pro.
- Windows (other versions): Click
 or
Start, and select All Programs or Programs. Select Epson
Software > Document Capture
Pro.
or
Start, and select All Programs or Programs. Select Epson
Software > Document Capture
Pro.
Note: You may need to select your scanner from the list, if necessary. - Windows 10: Click
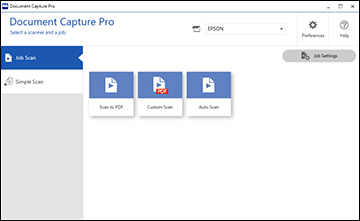
- Select the Job Scan tab. You see a window like this: