If you
notice that your paper does not cut cleanly, you may need to
replace the cutter. You will need a Phillips-head screwdriver.
Caution:
Do not remove the protective material from the
new cutter until instructed to do so. Do not drop the cutter or
knock it against anything or you may chip the blade.
Note: If the
optional SpectroProofer accessory is mounted on the printer, you
will have to remove the mount to replace the cutter. See the
SpectroProofer manual for instructions on removal and
installation.
- Press
the
 home button, if
necessary.
home button, if
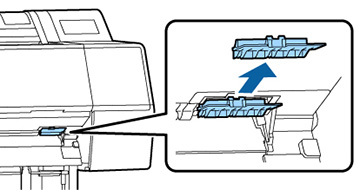
necessary. - Press down on the knob of the cutter replacement cover and pull the cover down and towards you to remove it.
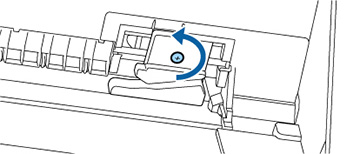
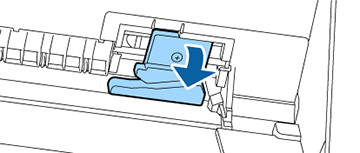
- Use a Phillips-head screwdriver to
loosen the screw holding the cutter in place and carefully remove
the cutter. Place the cutter in a plastic bag and dispose of it
properly.
Warning: Keep the cutter out of the reach of children. The blade is sharp and can cause injury.
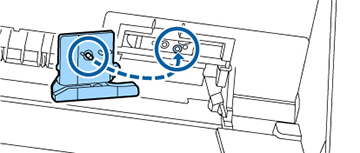
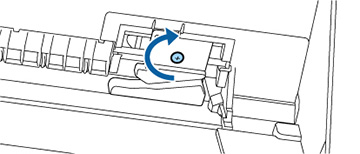
- Insert the screw into the new cutter as shown and align it with the hole on the product.
- Tighten the cutter screw
securely.
Note: Make sure the screw is tightened securely, otherwise the cut position may shift slightly.
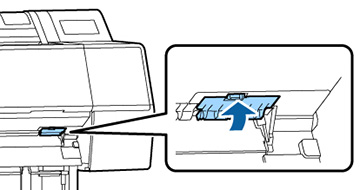
- Insert the base of the cutter replacement cover into the printer and push in the top part until it clicks into place.