When you finish printing on roll paper, remove
it from the printer to avoid indenting or creasing the paper.
Note: If you
enabled Remaining Amount Management,
the printer prints a barcode on the leading edge of the roll when
you remove the roll paper. When you reload the paper, the printer
reads the barcode and automatically sets the paper type and amount
remaining.
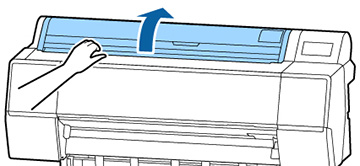
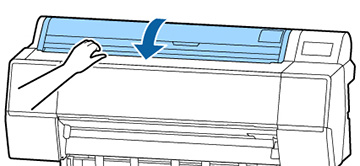
- Open the roll paper cover.
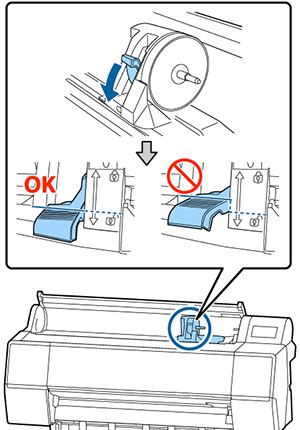
- Firmly push down the lock lever on the
roll paper holder to release it.
Note: Make sure you push the lock lever all the way down to unlock it completely.
- Using the handle, slide the roll paper
holder all the way to the left and remove it from the end of the
roll.
Note: Always use the handle when sliding the roll paper holder.
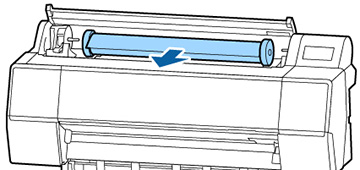
- Roll the paper forward so that it
rests on top of the printer.
Caution:Rolling the roll paper with too much force may damage the printer or the roll paper adapters.If the roll paper adapters are damaged, you may not be able to roll the paper forward. If this occurs, lift the roll paper out of the printer to remove it.
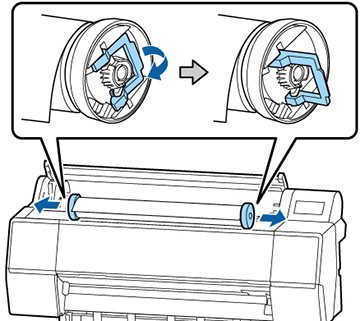
- Pull up the tension levers on the roll media adapters and remove the adapters from both ends of the paper roll.
- Close the roll paper cover.
Note: To prevent dust from accumulating inside the printer, always keep the roll paper cover closed unless you are loading or unloading media.