| E-1
Confirm that the network cable is connected and network devices
such as hub, router, or access point are turned on.
|
Make sure your router, access point, and/or hub
are turned on, and the network cable is securely connected to your
device and to your product.
If you are trying to set up Wi-Fi, remove the network cable and
set up Wi-Fi again. Ethernet and Wi-Fi cannot be connected at the
same time. |
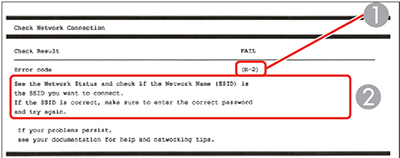
| E-2, E-3, or E-7
No wireless network names (SSID) found. Confirm that the
router/access point is turned on and the wireless network (SSID) is
set up correctly. Contact your network administrator for
assistance.
No wireless network names (SSID) found. Confirm that the
wireless network name (SSID) of the PC you wish to connect is set
up correctly. Contact your network administrator for
assistance.
Entered security key/password does not match the one set for
your router/access point. Confirm security key/password. Contact
your network administrator for assistance.
|
Check the following:
- Make sure your router or access point is turned on, and is
correctly connected to your computer or network device.
- Turn off the router or access point, wait about 10 seconds, and
turn it on again.
- Move your product closer to your router or access point, and
remove any obstacles between them. Also move your product away from
devices such as wireless phones or microwaves.
- Confirm that the SSID shown on the network connection report
matches the label on your router or access point. Also make sure
your SSID uses only ASCII characters and symbols, or your product
cannot display the SSID correctly.
- If you are trying to connect using the WPS push button method,
make sure your router or access point supports it.
- If you are using a network password, check the label on your
router or access point to confirm that you are using the correct
password, or check with your network administrator or router/access
point documentation.
- If you are connecting to a smart device that generates an SSID,
check the device documentation for the SSID and password you should
use.
- If your wireless connection suddenly disconnects, and another
smart device was added to the network using a WPS push button
method or your network was set up using a non-WPS push button
method, try downloading and installing your product software
again.
|
| E-5
Security mode (e.g. WEP, WPA) does not match the current setting
of the printer. Confirm security mode. Contact your network
administrator for assistance.
|
If the security on your router or access point
is not one of the following types, change the type of security on
your router or access point and reset your product's network
settings.
- WEP-64 bit (40 bit)
- WEP-128 bit (104 bit)
- WPA PSK (TKIP/AES); also known as WPA Personal
- WPA2 PSK (TKIP/AES); also known as WPA2 Personal
- WPA (TKIP/AES)
- WPA2 (TKIP/AES)
- WPA3-SAE (AES)
- WPA2/WPA3-Enterprise
|
| E-6
MAC address of your printer may be filtered. Check whether your
router/access point has restrictions such as MAC address filtering.
See the documentation of the router/access point or contact your
network administrator for assistance.
|
If your router or access point has MAC address
filtering enabled, register your product's MAC address so it is not
filtered. Locate the MAC address on the network connection report
and check your router or access point documentation for
instructions.
If your router or access point is using shared authentication
with WEP security, confirm that you are using the correct
authentication key and index.
If your router or access point limits the number of connected
devices, raise the connection limit. See your router or access
point documentation for instructions. |
| E-8
Incorrect IP address is assigned to the printer. Confirm IP
address setup of the network device (hub, router, or access point).
Contact your network administrator for assistance.
|
If your product's Obtain IP Address setting is set to Auto, enable DHCP on your router or access
point. If it is set to Manual, the
IP address may be out of range or on a different network segment;
set a valid IP address using your product control panel or the Web
Config utility.
You can also try turning off your product and the router or
access point, waiting about 10 seconds, and turning them on
again. |
| E-9
Confirm the connection and network setup of the PC or other
device. Connection using the EpsonNet Setup is available. Contact
your network administrator for assistance.
|
Make sure your computer or network device are
turned on. Also make sure that you can access the Internet and
other devices on the same network from the devices you are trying
to connect to your product.
If you still cannot connect to your product, turn off your
router or access point, wait about 10 seconds, and turn it on
again. Download and install your product software again to reset
your network settings. |
| E-10
Confirm IP address, subnet mask, and default gateway setup.
Connection using the EpsonNet Setup is available. Contact your
network administrator for assistance.
|
Make sure other devices on the network are
turned on and do the following:
- If your product's Obtain IP
Address setting is set to Manual, check the IP address, subnet mask, and
default gateway addresses on the network connection report to see
if they are correct. If not, correct the settings.
- If DHCP is enabled, set your product's Obtain IP Address setting to Auto. If you want to use the DHCP-assigned
address as a static address, set the Obtain
IP Address setting to Manual,
enter the product's IP address as listed on the network connection
report, and set the subnet mask to 255.255.255.0.
If you still cannot connect to your product, turn off your
router or access point, wait about 10 seconds, and turn it on
again. |
| E-11
Setup is incomplete. Confirm default gateway setup. Connection
using the EpsonNet Setup is available. Contact your network
administrator for assistance.
|
If you set your product's TCP/IP Setup setting to Manual, check that the default gateway address
listed on the network connection report is correct. Also turn on
the device that is set as the default gateway. |
| E-12
Confirm the following:
-Entered security key/password is correct
-Index of the security key/password is set to the first
number
-IP address, subnet mask, or default gateway setup is
correct
Contact your network administrator for assistance.
|
Make sure other devices on the network are
turned on and do the following:
- Make sure the IP address, subnet mask, and default gateway
addresses are correct, if you are entering them manually.
- Confirm that the subnet mask and default gateway addresses for
other devices are the same.
- Make sure the IP address does not conflict with other
devices.
If you still cannot connect to your product, do the
following:
- Turn off your router or access point, wait about 10 seconds,
and turn it on again.
- Download and install your product software again to reset your
network settings.
- If your router or access point uses WEP security with several
registered passwords, make sure that the first registered password
is set on your product.
|
| E-13
Confirm the following:
-Entered security key/password is correct
-Index of the security key/password is set to the first
number
-Connection and network setup of the PC or other device is
correct
Contact your network administrator for assistance.
|
Make sure your router, access point, and/or hub
are turned on. Also make sure the TCP/IP setup on your router,
access point, and/or hub is not set manually; this may cause your
product's network settings to differ from the manually set up
devices.
If you still cannot connect to your product, do the
following:
- Turn off your router or access point, wait about 10 seconds,
and turn it on again.
- Download and install your product software again to reset your
network settings.
- If your router or access point uses WEP security with several
registered passwords, make sure that the first registered password
is set on your product.
|