You
can use the remote control to control certain features of devices
connected to the projector's HDMI ports.
-
Press the
 Menu button on the projector's control
panel or remote control.
Menu button on the projector's control
panel or remote control. -
Select the Settings menu and press
 Enter.
-
Select the HDMI
Link setting and press Enter.
-
Select HDMI
Link and press Enter.
-
Select On
and press
 Esc.
Esc. -
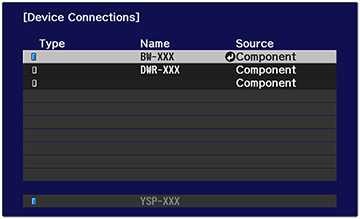
Select Device
Connections and press Enter. You see a screen like
this:
Note: The active linked device source is indicated in blue.
-
Select the device you want to control and
project images from and press Enter.
-
Select the following HDMI link options as
necessary:
- Audio Out Device: selects which device outputs audio. Select Projector to output audio from the projector’s built-in speakers or from an external speaker connected to the Audio Out port. Select AV System to output audio from an AV amplifier that supports the HDMI CEC standards.
- Power On Link: select what happens when you turn on the projector or linked device. Select PJ -> Device or Bidirectional to turn the linked device on when the projector is turned on, or Device -> PJ or Bidirectional to turn the projector on when the linked device is turned on.
- Power Off Link: select whether linked devices are turned off when the projector is turned off.
- When you are finished,
press Esc.