CAUTION:
Do not use a hard brush, alcohol, or paint
thinner to clean the product or you may damage it. Do not use oil
or other lubricants inside the product or let water get inside it.
Do not open the product's outer case.
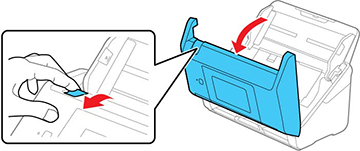
- Pull down on the cover open lever and open the scanner cover.
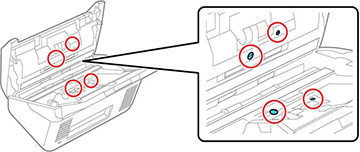
- Use a genuine Epson cleaning kit or a soft cloth to wipe off any dust or dirt on the glass scanning surfaces and the rollers inside the scanner cover. If the glass surface is stained with grease or some other hard-to-remove material, use a genuine Epson cleaning kit to remove stains. Use a small amount of cleaner on the cleaning cloth to remove the stains. Wipe off all remaining liquid.
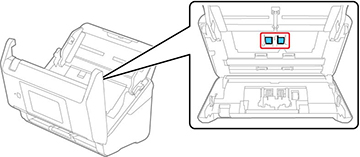
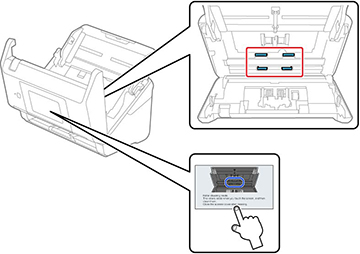
- Use a cotton swab to wipe off any dust or dirt on the sensors shown here.
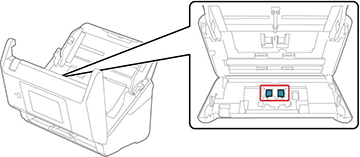
- Locate the separation roller.
- Squeeze the tabs on the sides of the separation roller cover and open the cover.
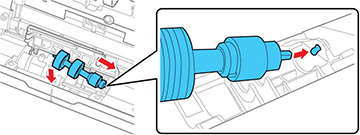
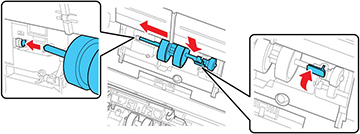
- Slide the separation roller to the left and remove it.
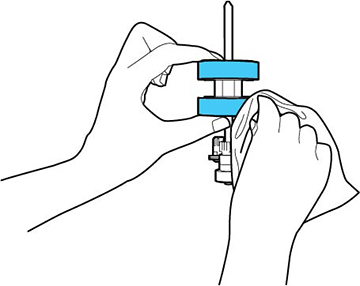
- Wipe off any dust or dirt on the
separation roller using a genuine Epson cleaning kit or a soft,
moist cloth.
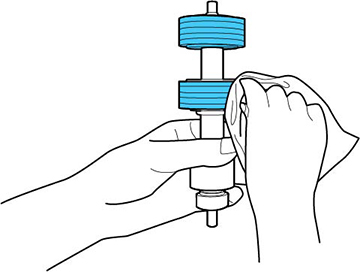
CAUTION:Use only a genuine Epson cleaning kit or soft, moist cloth to clean the roller; using a dry cloth may damage the surface of the roller. Do not spray cleaners directly inside the product; always spray cleaners on a cleaning cloth to slightly dampen the cloth. Wipe off any excess cleaner with a dry, lint-free cloth. - To replace the separation roller, insert the end of the roller into the hole on the right side and lower the other end of the roller into place.
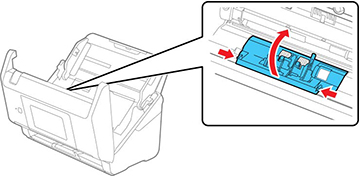
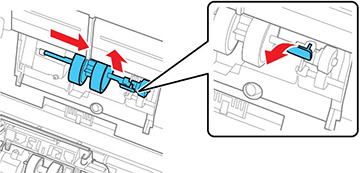
- Locate the pickup roller.
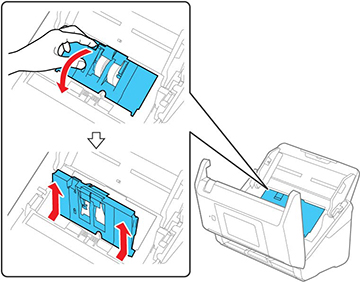
- Press down on the pickup roller cover latch and pull up the cover to remove it.
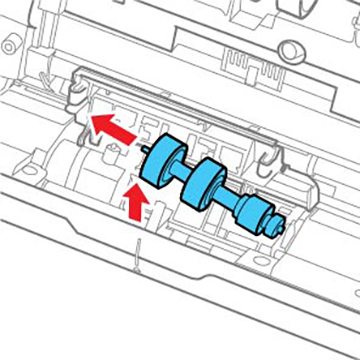
- Pull down the tab on the pickup roller and slide the roller to the right to remove it.
- Wipe off any dust or dirt on the pickup roller using a genuine Epson cleaning kit or a soft, moist cloth.
- To replace the pickup roller, align the notches on the roller unit and slide it to the left. Press up on the tab to secure the roller.
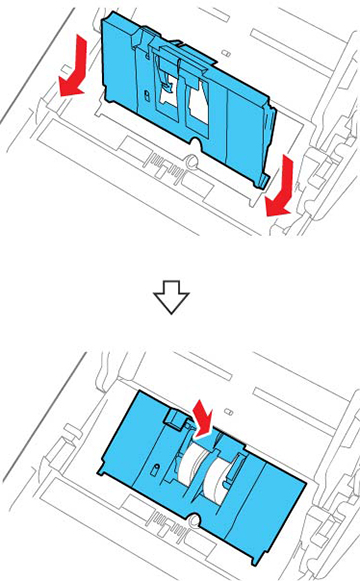
- Align the bottom edge of the pickup roller cover into the notches as shown and press it down until it clicks into place.
- Plug in the AC adapter and press the
 power button to turn on the
product.
power button to turn on the
product.
- Press the
 home button, if necessary, and
select Scanner
Maintenance.
home button, if necessary, and
select Scanner
Maintenance.
- Pull
down on the cover open lever and open the scanner cover.
The product enters roller cleaning mode.
- Slowly rotate the rollers shown here by tapping anywhere on the LCD screen. Use a genuine Epson cleaning kit or a soft, moist cloth to wipe off any dust or dirt on the rollers as they rotate. Repeat this step until the rollers are clean.