CAUTION:
Do not load photos, or valuable original
documents or artwork, directly into the input tray. This may
wrinkle or damage the original. Load these originals using an
optional carrier sheet.
Note: Photos
scanned using a document scanner may not have the same color depth
as the original. Use a flatbed photo scanner to achieve the best
color reproduction of photos.
The steps below describe loading originals of the same size. To load originals of multiple sizes at once, see the link at the end of these steps.
- Pull out the output tray and its extension, and open the stopper.
- Slide the input tray edge guides all the way out.
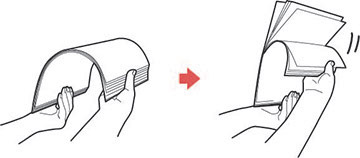
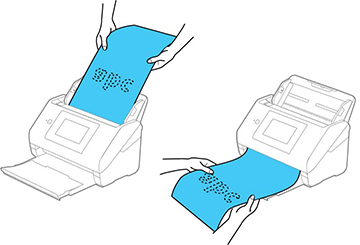
- If you are loading a multi-page original, fan your stack of originals.
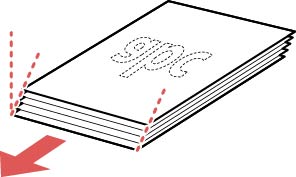
- Stack the originals with the printed side facing down and slide the stack so the leading edge is at an angle as shown.
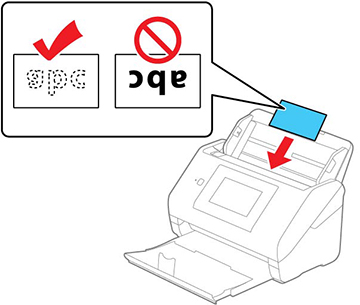
- Load
standard originals into the input tray printed side down and top
edge first, and guide them in until they meet resistance.
- If you are loading paper business cards, load up to 30 cards
(printed side down and long edge first) into the input tray
horizontally, and slide them in until they meet resistance.
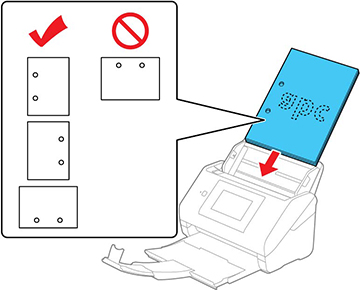
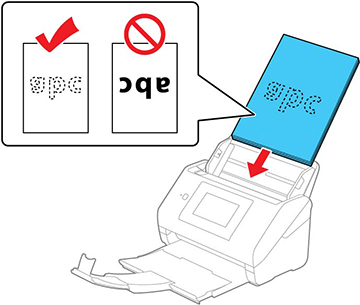
- If you are loading hole-punched originals, load them with the
holes facing down or to the side as shown. The holes must be within
1.2 inches (30 mm) of the edge of the originals.
- If you are loading paper business cards, load up to 30 cards
(printed side down and long edge first) into the input tray
horizontally, and slide them in until they meet resistance.
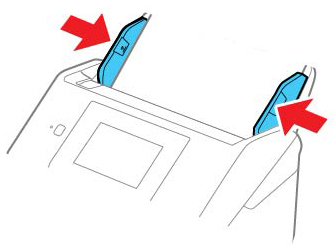
- Slide the edge guides against the edges of the original.


If scanning thin or wrinkled paper causes paper jams or double feeds, slow down the feeding speed by selecting Settings > Scanner Settings > Slow > On on the LCD screen.
If a paper feed error is detected, the Paper
Protection feature stops the scanning process automatically to
reduce damage to the original. To change the Paper Protection
detection level, select Settings
> Scanner Settings >
Paper Protection on the LCD screen
and select the desired level.
Note: The Paper
Protection feature does not prevent all documents from being
damaged. Paper feed errors may not be detected depending on the
paper feeding conditions.