You can set
a static IP address on the projector's LCD screen while the
projector is in standby mode. This lets you set the address without
needing to project anything.
- Press the Menu button on the projector or remote control.
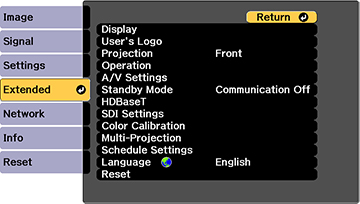
- Select the Extended menu and press Enter.
- Select the A/V Settings > A/V Output, select Always On, and press Enter.
- Select Standby Mode, select Communication On, and press Enter.
- Press the Menu button to exit the menu system.
- Turn off the projector, connect it to a wired LAN, and turn on the power using the power switch.
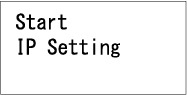
- Hold down the LAN button on the projector control panel for at least three seconds. You see the static IP setting menu:
- Press the Enter button on the projector control panel, press the down arrow button to select OFF as the DHCP setting, and press Enter again.
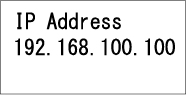
- Use the up and down arrow
buttons as necessary to change the IP address values. Use the left
and right arrow buttons to move the cursor to the next or previous
number position. When you finish, press Enter.
Note: You can also enter the numbers using the numeric buttons on the remote control.
- Repeat the last step to enter the subnet mask and gateway address, if necessary, and press Enter.
- Press Enter to select Finish and return to the status information screen.