You can
register the digital certificates on the projector for wireless LAN
authentication.
Note: You can
also register the digital certificates in the projector's Network
menu. However, be sure to register just once or the certificate may
not install correctly.
- Make sure your digital certificate file is compatible with projector registration.
- Make sure the projector is turned on.
- Start your web browser on a computer or mobile device connected to the network.
- Type the projector's IP address into the browser's address box and press the computer's Enter key. You see the Web Control screen and a prompt to enter a user ID and password.
- Select Advanced and enter the following information in uppercase or lowercase letters, exactly as shown:
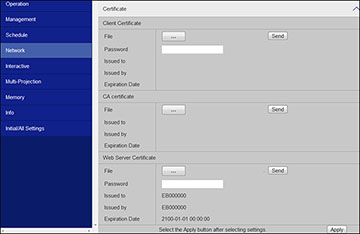
- Under Network, select Certificate. You see a screen like this:
- Click the Choose File
button, select the certificate file, and click Open.
Note: The button name may vary depending on the browser you are using.
- Enter a password in the Password box and click Send.
- When you finish registering the certificate, click Apply to finalize your changes and complete the registration.