You
can set up network scanning to your scanner through a direct
connection to your scanner.
First, manually configure your scanner to connect to your network. Then follow the instructions here to set up your computer for network scanning using the Epson Scan 2 Utility. Your scanner must be turned on and connected to the network.
Note: Make a note
of the IP address or host name of the scanner so you can enter it
in these steps.
- Do one
of the following to start the Epson Scan 2 Utility:
- Windows 10: Click
 > EPSON > Epson Scan 2
Utility.
> EPSON > Epson Scan 2
Utility. - Windows 8.x: Navigate to the Apps screen and select Epson Scan 2 Utility.
- Windows (other versions): Click
 or
Start > All Programs or Programs > EPSON > Epson Scan
2 > Epson Scan 2
Utility.
or
Start > All Programs or Programs > EPSON > Epson Scan
2 > Epson Scan 2
Utility. - Mac: Open the Applications folder, click Epson Software, and click Epson Scan 2 Utility.
- Windows 10: Click
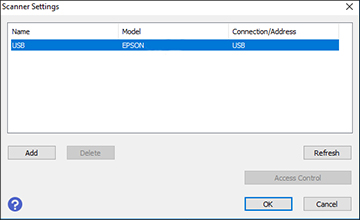
- Select
Settings from the Scanner drop-down
list. You see a screen like this:
Note: If you see an Enable Editing button (Windows) or the lock icon (Mac), click it so that you can modify the scanner settings.
- Select your scanner and click Add. You see a screen like this: