When
installing the projector in an optional mount, follow these
guidelines:
Note: You
will require the optional mounting plate (ELPMB65) to install the
projector in a mount.
- You can install the projector on VESA-compliant (75 × 75 mm) mounting hardware.
- You can install the projector on a tripod that uses 1/4-20UNC size fixed screws
- When installing the projector in a high place, be sure to install the optional security wire set (ELPWR01) for safety purposes
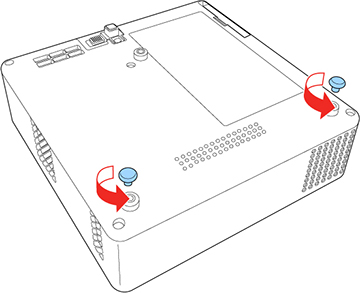
- Turn the projector upside down.
- Remove the rear feet by turning them clockwise.
- When installing the projector in a high place, thread the optional security wire set (ELPWR01) through the mount plate.
- Attach the mounting plate
to the projector and secure it in place with the screws that came
with the mounting plate.
Caution:Do not use the feet you removed in step 2 to attach the mounting plate. They could loosen and cause the projector to fall. Use the screws supplied with the mount plate (M4 × 6 mm max. depth).
- Install the projector onto
the mounting hardware or a tripod. For details, see the
documentation supplied with the mount or tripod.
Caution:When installing the projector on the mount or tripod, make sure you tighten the screws securely. If you place the projector upside down, the screws could loosen and the projector could fall.
When installing the projector in a high location using the safety wire set, make sure you attach the carabiner to a point that is strong enough to support the weight of the projector and mounting hardware.
- If necessary, mount the AC
adapter on the wall or ceiling using the AC adapter holder that is
included with the mounting plate.
Caution:Install the AC adapter at least 11.8 inches (30 cm) away from the projector. If the temperature of the AC adapter rises due to heat from the projector, the projector may not operate properly.Note: When mounting the AC adapter on the wall or ceiling, use screws suitable for the material of the wall or ceiling. If you are unsure what screws to use, consult a professional.