- Press the
 Power button on the projector or
remote control.
Power button on the projector or
remote control.
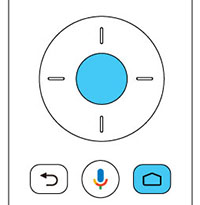
- When the pairing screen is
displayed, press and hold the Enter and
 Home remote control buttons at the same
time.
The light on the remote control flashes until pairing is
complete.
Home remote control buttons at the same
time.
The light on the remote control flashes until pairing is
complete. - Use the remote control arrow and Enter buttons to select the language you want to use from the language selection screen.
- Do one of the
following:
- Select Continue to use an Android phone to set-up the projector's Wi-Fi and Google account settings. Follow the on-screen instructions and skip to step 7.
- Select Skip to set-up the projector's Wi-Fi and Google account settings manually. Go to the next step.
- Select the wireless network you want to use from the Wi-Fi setting screen and then follow the on-screen instructions to make any necessary settings.
- At the Google account
sign-in screen, do one of the following:
- Select Sign In to sign-in to your Google account. Follow the on-screen instructions.
- Select Skip
to use the projector without signing in to a Google account
Note: A Google account is required to use certain features.
- Follow the on-screen
instructions to proceed with initial setup, selecting settings as
desired. The Home screen is displayed when initial setup is
completed.
Note: For Android TV support, visit https://support.google.com/androidtv/.