You can scan
an original and save it to a connected computer using your
product's control panel. The computer must be connected using a USB
cable or connected to the same network as your product.
You can save the scanned file as a JPEG or PDF file. You can also set up custom scan settings using Event Manager and automatically scan using those settings on your product control panel.
Note: Be sure
you have installed Epson ScanSmart, Epson Scan 2, and Event Manager
on your computer before scanning to your computer.
- Place your original on the product for scanning.
- Press the
 home button, if
necessary.
home button, if
necessary. - Select Scan.
- Select Computer.
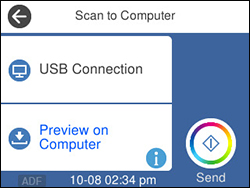
You see a screen like this:
Note: Select OK to close the information screen, if necessary.
- Select Select a computer and choose one of the following options:
- Select Preview on Computer and choose one of the
following options:
- Preview on Computer to preview the scanned image on a computer before saving. (Windows 7 or later or OS X 10.11.x or later)
- Save as JPEG to save the scanned scanned image as a JPEG file.
- Save as PDF to save the scanned document or image as a PDF file.
- Select Send to start scanning.