You can
print from a USB memory device connected to your printer.
Note: Connections
that use an extension cable, a USB hub, or a card reader cannot be
guaranteed.
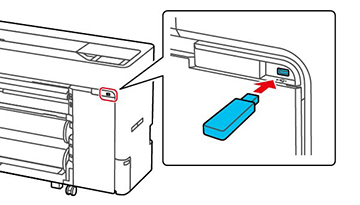
Connect
the USB memory device containing the saved data to the USB memory
device port on the control panel.
Press the home button, if necessary.
Select
Memory Device.
Select
the menu option that matches the format of the file you want to
print.
Do one of the following to select a
single image to print:
For JPEG: Select an image and
select Proceed to Print (a check
mark will appear on the selected image). Select Single View to view the selected image
individually.
For TIFF or PDF: Select a file name from the list on the
screen.
Note: Files in
formats other than JPEG, TIFF, or PDF are not displayed on the LCD
screen. Any characters in the folder or file names that cannot be
displayed by the printer are displayed as a question
mark.
Select
the paper source and either B&W
or Color.
Choose one of the following:
If using advanced settings such as enlarging or reducing print
size, go to the next step.
If printing at actual size without advanced settings, skip to
step 10.
Select
the Advanced tab and select any
necessary settings. You can select Reduce/Enlarge to set the reduce/enlarge ratios.
If you set Auto Fit Page to
On, printing is performed by
automatically enlarging to fit the width of the roll paper or the
size of the cut sheet paper loaded in the printer.
Note: You can
select Presets to use a previously
saved group of settings. The Preview button allows you to check the
print image (JPEG, TIFF, or PDF only).
Change other settings, as
necessary.
Select Print to begin printing.
Note: You need the
SSD unit to print multiple copies. Install the SSD unit if
necessary, and create a storage space. (The SSD unit is included
with SureColor T5770DM/T7770DM and optional for all other
models.)