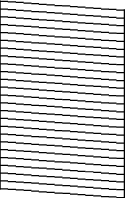
You can
check the print head nozzles using the control panel on your
product.
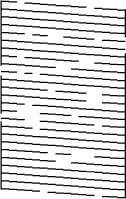
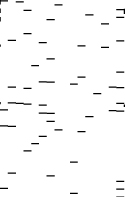
If you don’t
see any improvement after cleaning the print head up to 3 times,
turn the product off using the
 power
power button and wait at least
12 hours. Then run a nozzle check and try cleaning the print head
again, if necessary. If quality still does not improve, run a Power
Cleaning.