When you
change your print settings in a program, the changes apply only
while you are printing in that program session. If you want to
change the print settings you use in all your Windows programs, you
can select new default print settings.
- Do one of the following:
- Windows 11:
Click
 , search for Settings and select it. Select Bluetooth & devices > Printers & scanners. Right-click on your
product, select the PCL option, and select Printer properties.
, search for Settings and select it. Select Bluetooth & devices > Printers & scanners. Right-click on your
product, select the PCL option, and select Printer properties. - Windows 10:
Click
 and select
  (Settings) > Devices > Printers & scanners. Right-click on your
product, select the PCL option, and select Manage > Printing preferences.
(Settings) > Devices > Printers & scanners. Right-click on your
product, select the PCL option, and select Manage > Printing preferences. - Windows 8.x: Navigate to the Apps screen and select Control Panel > Hardware and Sound > Devices and Printers. Right-click on your product, select the PCL option, and select Printing preferences.
- Windows 7:
Click
 and select Devices and Printers. Right-click on your
product, select the PCL option, and select Printing preferences.
and select Devices and Printers. Right-click on your
product, select the PCL option, and select Printing preferences. - Windows
Vista: Click and select Control Panel. Click Printer under Hardware and Sound, then right-click on your
product, select the PCL option, and select Properties.
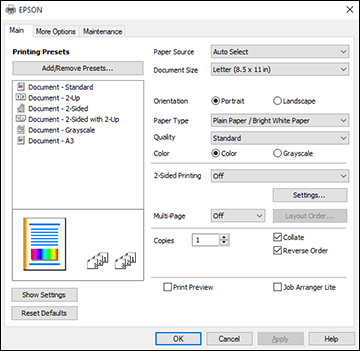
Note: For more information about a setting, right-click it and select Help. - Windows 11:
Click
- Select the print settings you want to use as defaults in all your Windows programs.
- Click OK.