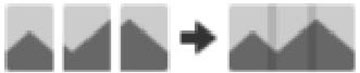
You can combine scanned photos to create a single
image. You can use either of the following methods.

Note: Images that
are too large cannot be stitched together. The longest edge of the
photo must not exceed the following:
- Place the originals on your scanner.
- Open Epson ScanSmart. Do one of the following:
- To scan from the scanner, press the
 button on the scanner. Epson
ScanSmart opens and scanning starts.
button on the scanner. Epson
ScanSmart opens and scanning starts. - To scan from your computer, start Epson ScanSmart, and then click SCAN.
- To scan from the scanner, press the
- Select photos you want to combine, and then click Stitch Images. To select multiple images, hold down the Ctrl or Shift key while clicking on the images.
- Select Basic Stitching or Advanced Stitching.
- On the Stitch Images screen, check the stitched image. When you have selected Basic Stitching, you can edit the image using the buttons at the top of the screen to rotate and change the position of the images.
- Click OK, and then follow the on-screen instructions to save the image.