When
printing a document with multiple chapters, you can insert a slip
sheet (blank page) between certain pages of your document, and you
can print chapter papers (pages of a document set to be printed
from specific paper sources on the product).
Note: Slip
sheets and chapter papers are not available if you select
Job Type > Save to Storage or Save to Storage and Print. The following
settings are unavailable when printing slip sheets or chapter
papers:
- Multi-page
- Reverse Order
- Send cover to bottom of stack
- Extended Settings > Print a document with both single-sided and double-sided pages
- Bookbinding printing
- Select whether to print the first page of paper on the front or back when printing double-sided
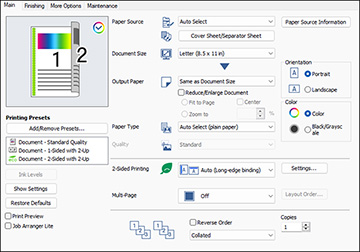
- Load the papers you want to use for your print job in the product's paper sources.
- Open the file you want to print on your computer and then select the print command in your application. You see a window like this:
- On the Main tab, select a 2-Sided Printing setting for your print job.
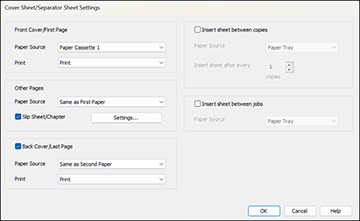
- Select Cover Sheet/Separator Sheet under the Paper Source setting. The Cover Sheet/Separator Sheet Settings window appears.
- Adjust the settings for the first and last pages, as needed.
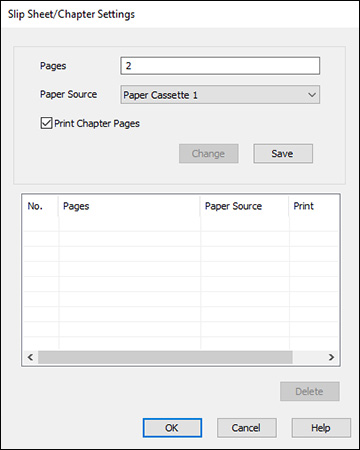
- To make settings for pages other than the first or last pages, select the Slip Sheet/Chapter checkbox, and then select Settings. The Slip Sheet/Chapter Settings window appears.
- Enter the settings for specific pages and click
Save for each entry.
- To choose the location where you want to insert a slip sheet or print a chapter, use the Pages field. Use commas to separate pages and use hyphens to specify ranges. For example: When you want to insert a slip sheet before pages 2 and 9, enter"2,9". If you want to print pages 4 and 7 on the chapter paper, enter "4,7".If you want to print pages 4 to 7 on the paper in the specified paper source, enter "4-7".
- To select the paper source for the entry, select Paper Source and select a paper source.
- If the entry is for a chapter page, select the Print Chapter Pages checkbox.
- To modify an entry, select it and change the settings, then click Change.
- To save an entry, select Save.
- To delete an entry, select it from the list and click Delete.
- Click OK to return to the Cover Sheet/Separator Sheet Settings window, and then click OK to return to the Main tab of the printer driver.
- Make any necessary settings on the Finishing and More Options tabs and then click OK.
- Click Print.