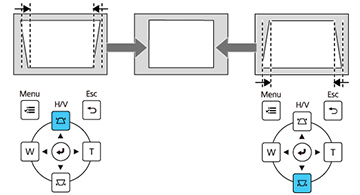
You
can use the projector's keystone correction buttons to correct the
shape of an image that is unevenly rectangular on the sides.
Note: You can
use the keystone buttons to correct the image up to ± 3°
horizontally or vertically. If the projector is
mounted on the wall, use the adjustment dials on the wall mount to
correct the screen image before using any other digital correction
methods.
Note: You
cannot combine keystone correction with other correction methods at
the same time.
Note: If you
change the Screen Type setting or
adjust the image position, your image adjustments are
reset.
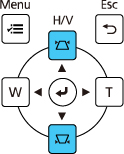
- Turn on the projector and display an image.
- Press one of these keystone buttons on the control panel to display the Keystone adjustment screen.
-
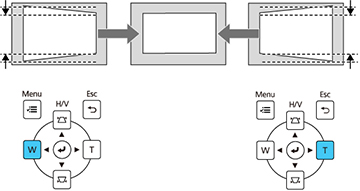
Press a keystone button on the projector's
control panel to adjust the image shape.
Note: The horizontal keystone adjustment buttons are labeled W and T.After correction, your image is slightly smaller.Note: To save the current image shape, select Save Memory. You can save up to three image shapes in the projector's memory.Note: If the projector is installed out of reach, you can also correct the image shape with the remote control using the H/V-Keystone settings in the projector menus.