- Press the Menu button.
-
Select the Management menu and press
 Enter.
 -
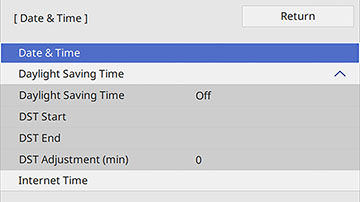
Select the Date
& Time setting and press Enter. You see a screen like
this:
-
Select the Date
& Time setting and press Enter.
- Select Date, press Enter, and use the displayed keyboard
to enter today's date.
- Select Time, press Enter, and use the displayed keyboard
to enter the current time.
- Adjust the Time Difference (UTC) settings to set the
time difference from the Coordinated Universal Time.
Note: If you use this setting, enter Coordinated Universal Time as the Time setting instead of your local time.
-
When you are finished, select Set and press Enter.
- To activate daylight saving time, select the Daylight Saving Time setting and set it to On. Then select settings.
- When you are finished,
select Set and press Enter.
- To update the time automatically through an internet time server, select the Internet Time setting and set Use Internet Time to On.
- Select Internet Time Server and press Enter.
- Enter the IP address for the Internet time server you want to use and select OK.
- Select Set and press Enter.
- Press Menu or Esc to exit the menus.