You can set up or install your projector in the
following ways:
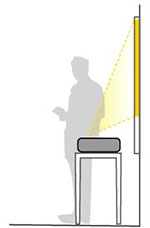
Front projection from a table or portable cart
Rear projection from a table or portable cart behind a
translucent screen
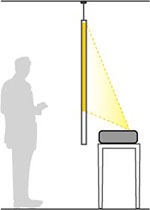
Mounted on the wall
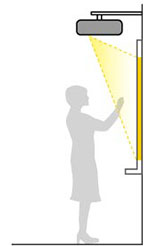
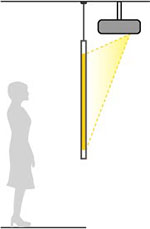
Mounted on the ceiling and projecting from behind a
translucent screen
Wherever you set up the projector, make sure to
position it squarely in front of the screen, not at an angle.
If you install the projector to a fixed location, turn
on the Fixed Installation setting
in the projector's Installation menu.
Select the correct Projection option from the Projector's menu
system depending on whether you're projecting from the ceiling,
wall, rear, table, or portable cart. If you're projecting from a
table or portable cart, make sure to install the projector feet
before selecting the appropriate Projection option.
Note: If the
projector is installed at an angle, it should be installed by
qualified technicians using mounting hardware designed for use with
this projector. Install the projector appropriately to prevent it
from falling down.
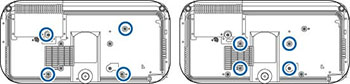
Note: Install
the projector appropriately to prevent it from falling down. Use M4
screws (up to a depth of 0.35 inches [9 mm]) to fix the projector's
ceiling mount fixing points and the mounting hardware at the four
points.
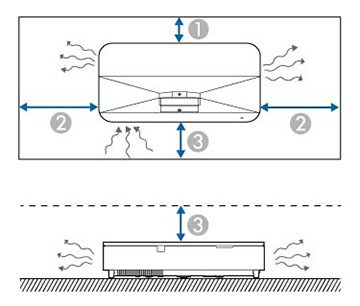
Installation space
Be sure to leave the following amount of space
around the projector so as to not block the air exhaust or intake
vents.
| 1 |
0.9 inches (2.3
cm) |
| 2 |
7.9 inches (20 cm) |
| 3 |
3.9 inches (10 cm) |
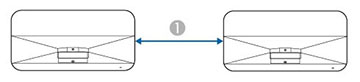
When installing multiple projectors
side-by-side
Without partition
If you are installing multiple projectors next to
each other, make sure hot air from the exhaust vent does not go
into the air intake vent of the other projector.
With partition
If you use a partition, you can narrow the space
between the projectors.
| 2 |
Partition |
| 3 |
7.9 inches (20 cm) |