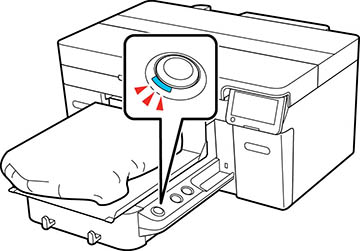
When the
printer has finished receiving data, a preview appears on the
printer's screen and the  start light turns on and you can
start the print job.
start light turns on and you can
start the print job.
Note: If you send
print jobs using any of the following methods, the number of copies
displayed on the control panel does not indicate the number of
copies to be printed, even when multiple copies have been
specified:
- When using a hot folder that was created in the Garment Creator Easy Print System
- When resending a job from the print history in Garment Creator 2
- When a job (print data) was exported to a computer and then opened in Garment Creator 2 and sent
- When printing from a USB memory stick
To
reprint the job, select Menu >
Reprint, and then enter the number
of prints and select Done. When the
preview appears on the LCD screen and the start light turns on, load the
media on the platen and press the start button.
Note: Reprint data
is not overwritten until a new job is sent to the printer. Reprint
data is not deleted until the USB memory stick is removed or the
printer is turned off. If saving reprint data fails, an error
message is displayed when you select Reprint. Reprint data is not saved if the
following occurs:
- The USB memory stick is corrupt
- There is not enough space on the USB memory stick or the maximum number of files is reached
- The USB memory stick was removed from the printer while data was being written/read
- Printing was started by pressing the start button on the printer,
but was canceled before printing was complete