You can move
the printer across the room or to another room on the same floor,
or transport it to another building or location as described here.
Note: Wear the
protective gloves included in the maintenance kit to prevent your
hands from being soiled by waste ink.
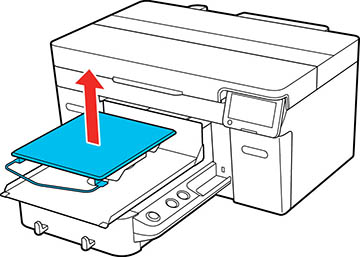
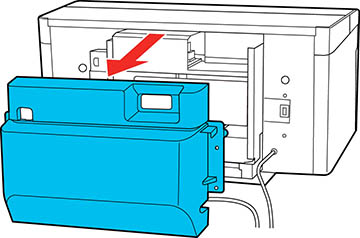
- Grip the
platen on the left and right sides and then lift it straight up to
remove it.
Note: If you are using the sleeve platen, first remove the fixing band.
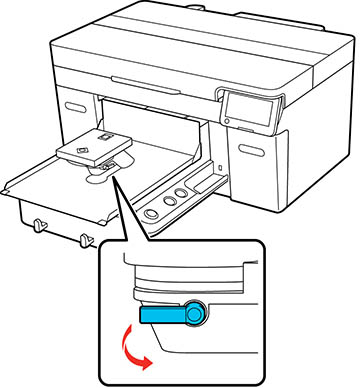
- Loosen the fixing lever.
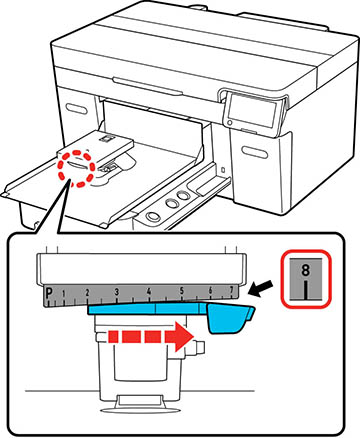
- Move the platen gap lever to the right to set the scale to 8.
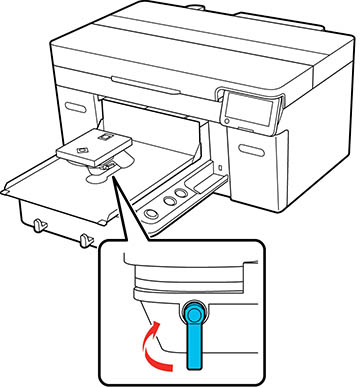
- Tighten the fixing lever and then secure the platen gap lever.
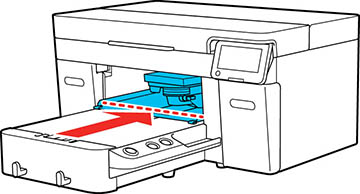
- Move the moveable base by hand to the
position shown below.
Caution:Never move the moveable base by hand except as outlined for this purpose; otherwise, a malfunction may occur.
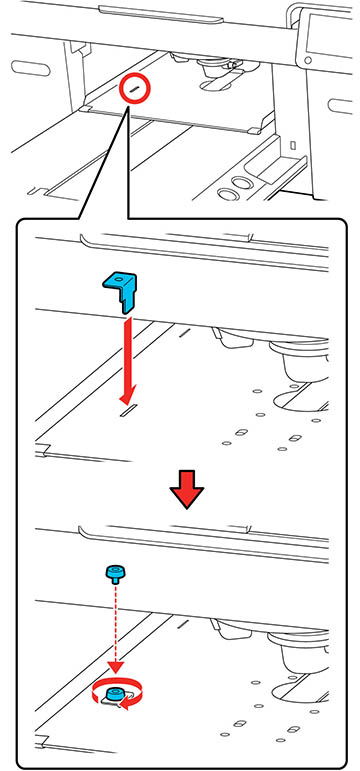
- Re-install the carriage lock that you removed during initial setup and then secure it with the screw.
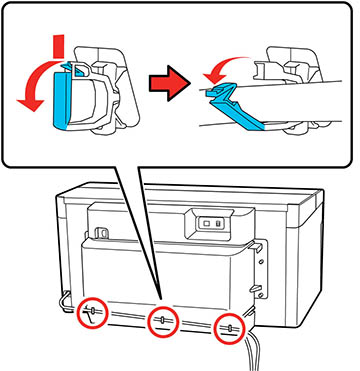
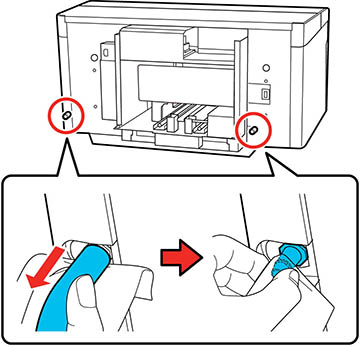
- Remove the waste ink tube from the tube clamps.
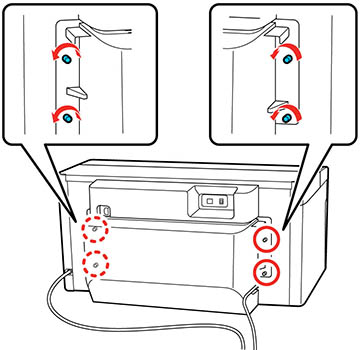
- Unscrew the rear cover fixing screws.
- Remove the rear cover.
- Hold the waste ink tubes from the
bottom with a wipe and then pull them out as shown. Use the wipe to
wipe waste ink from the waste ink outlets.
Note: Be careful when removing the waste ink tubes; waste ink may spill from the outlet or tube.
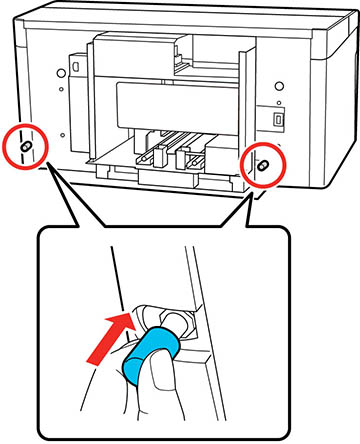
- Attach the waste ink outlet caps that were removed during printer assembly. See the Start Here sheet for more information.