You can run
a Power Cleaning using a utility on your Windows or Mac computer.
Note: Ink
will be deposited to the maintenance box. If it becomes full, you
must install a new maintenance box to continue
printing.
- Load a few sheets of plain paper in the product.
- Do one of the following:
- Windows:
Access the Windows Desktop and right-click the
 icon for your product in the right
side of the Windows taskbar, or click the up arrow and right-click
. Select Printer Settings and click the Maintenance tab.
icon for your product in the right
side of the Windows taskbar, or click the up arrow and right-click
. Select Printer Settings and click the Maintenance tab. - Mac: In the Apple menu or the Dock, select System Preferences or System Settings. Select Print & Fax, Print & Scan, or Printers & Scanners, select your product, and select Options & Supplies. Select Utility and select Open Printer Utility.
- Windows:
Access the Windows Desktop and right-click the
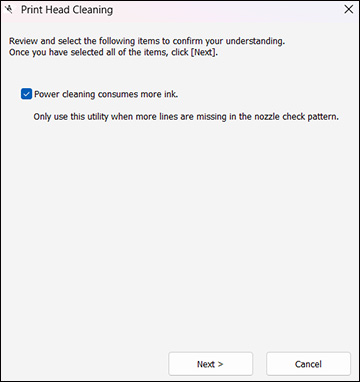
- Select Print Head Cleaning > Power Cleaning. You see a window like this:
- Follow the on-screen instructions to run a Power Cleaning.
- When Power Cleaning is finished, run a nozzle check.
If you still see
gaps in the nozzle check pattern after running a Power Cleaning,
turn the product off and wait for at least 12 hours. Then run the
nozzle check again and run a Cleaning if necessary. If print
quality does not improve, run a Power Ink Flushing. If print
quality still does not improve, contact Epson support.