- Turn on the projector and display an image.
-
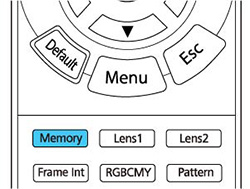
Press the Memory button on the remote control.
Note: You can also access these settings from the projector's Memory menu.
-
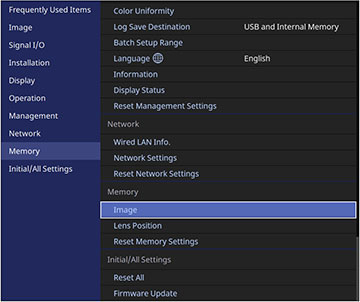
Select one of the following options:
- Image: saves your current Image menu settings for each color mode along with the Blanking setting for the projected image (up to 10 memories)
- Lens
Position: saves your current focus, zoom, and lens shift
settings (up to 10 memories); load the saved settings by pressing
the Lens1 or Lens2 button on the remote control
Note: Some slight adjustments may be needed after switching to a different lens position memory.
Note: To clear all saved memories, select Reset Memory Settings. - Select one of the
following options:
- Save
Memory: saves your current settings to memory (10 memories
with different names are available)
Note: A memory name that has already been used is indicated by a blue mark. Saving over a previously saved memory overwrites the settings with your current settings.
- Load Memory: overwrites your current settings with saved settings
- Erase Memory: erases the selected memory settings
- Rename Memory: renames a saved memory
- Reset: resets the name and settings of a saved memory
- Save
Memory: saves your current settings to memory (10 memories
with different names are available)
- Press Menu or Esc to exit the menus.