You
can save customized settings and then select the saved settings
whenever you want to use them.
-
Turn on the projector and display an image.
-
Press the Menu button.
Note: You can also
press the Memory button on the
remote control. Skip to step 5.
-
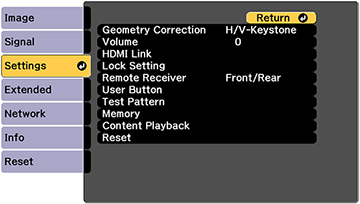
Select the Settings menu and
press
 Enter.
-
Select the Memory setting and
press Enter.
Note: You can also
access this screen by pressing the Memory button on the remote control.
-
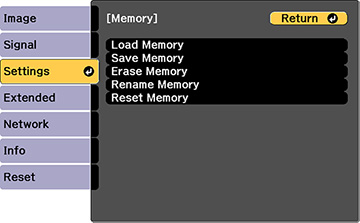
Select one of the following options:
-
Memory:
Saves or loads various settings; you can save up to 10 different
memories
-
Lens
Position: Saves or loads settings related to the lens, such
as the lens shift, focus, zoom, and distortion adjustment settings;
you can save up to 10 different memories
-
Geometry
Correction: Saves or loads any adjustments made in the
Geometry Correction setting in the
Settings menu; you can save up to 3 different memories
You see this screen:
-
Select one of the following options:
-
Load
Memory: Overwrites your current settings with saved
settings
-
Save
Memory: Saves your current settings to memory
Note: A memory
name that has already been used is indicated by a mark. Saving over
a previously saved memory overwrites the settings with your current
settings.
-
Erase
Memory: Erases the selected memory settings
-
Rename
Memory: Renames a saved memory
-
Reset
Memory: Resets the name and settings of a saved memory
Note: To reset all
saved memories of all types, select Reset
All Memories in the Reset menu.
-
Press Menu or Esc to exit.