You can use
EpsonNet Config to connect the scanner to an existing Wi-Fi network
on a router or access point.
Note: You must
have a computer with a wireless adapter to set up the connection.
If EpsonNet Config is not installed, go to the Epson
website.
- Slide the cover latch to open the scanner.
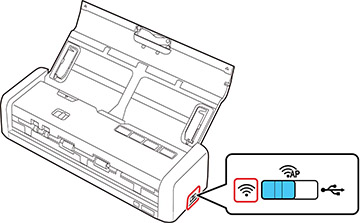
- Set the connection mode switch on the
side of the scanner to the
 AP mode position.
- Do one
of the following to start EpsonNet Config:
- Windows 10: Click
 > All
apps > EpsonNet >
EpsonNet Config.
> All
apps > EpsonNet >
EpsonNet Config. - Windows 8.x: Navigate to the Apps screen and select EpsonNet Config.
- Windows (other versions): Click
 or Start, and select All
Programs or Programs. Select
EpsonNet > EpsonNet Config > EpsonNet Config.
or Start, and select All
Programs or Programs. Select
EpsonNet > EpsonNet Config > EpsonNet Config. - Mac: Open the Applications folder, select Epson Software > EpsonNet > EpsonNet Config > EpsonNet Config.
- Windows 10: Click
- Set the
connection mode switch on the side of the scanner to the
 Wi-Fi position.
- Turn on
the scanner. When the ready and
Wi-Fi lights on the scanner stay on,
the connection is established.