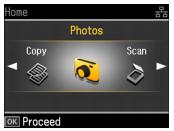
You can print the same photo or multiple photos on a single sheet of paper using the Artisan 700 Series templates.
|
1.
|
Load 4 × 6, 5 × 7, 8 × 10-inch, letter- or A4-size paper.
|
|
2.
|
Insert a memory card in a memory card slot.
|
|
3.
|
|
4.
|
Press OK.
|
|
5.
|
|
•
|
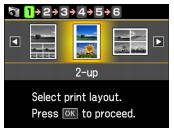
2-up prints 2 photos on a sheet.
|
|
•
|
4-up prints 4 photos on a sheet.
|
|
•
|
8-up prints 8 photos on a sheet.
|
|
•
|
20-up prints 20 photos on a sheet.
|
|
•
|
Upper 1/2 prints one photo on the upper half of a sheet.
|
|
•
|
Lower 1/2 prints one photo on the lower half of a sheet.
|
|
•
|
Photo ID prints 4 ID-size photos on a sheet.
|
|
•
|
Jewel Upper prints a photo on the front of a jewel case insert.
|
|
•
|
Jewel Index prints 24 small pictures in a layout that fits in a jewel case.
|
|
•
|
Picture Package prints one photo in multiple sizes on a letter- or A4-size sheet.
|
|
7.
|
To change the paper size, press
|
|
8.
|
To change the paper type, press
|
|
9.
|
When you’re done selecting paper settings, press OK. You see this screen:
|
|
10.
|
Press
|
|
11.
|
Press OK.
|
|
•
|
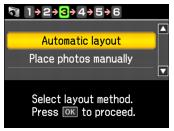
If you selected Automatic layout, press + or – to select the number of times you want the image to appear in the layout sheet.
|
To crop your photo and enlarge the resulting image area to fit onto your paper, press Display/Crop. After you finish cropping your photo, press OK.
Note:
If you select more photos or copies of an image than your layout allows, the printer automatically creates an additional layout sheet.
If you select more photos or copies of an image than your layout allows, the printer automatically creates an additional layout sheet.
|
•
|
If you selected Place photos manually, follow the instructions on the LCD screen to add photos to the layout sheet.
|
To crop your photo and enlarge the resulting image area to fit onto your paper, press Display/Crop. After you finish cropping your photo, press OK.
Note:
If you don’t select enough photos to fill the layout you selected, you will see a warning message, and the layout will have some blank space.
If you don’t select enough photos to fill the layout you selected, you will see a warning message, and the layout will have some blank space.
|
15.
|
|
16.
|
To change any of the print settings displayed on the screen, press Menu, press
|
|
17.
|
To change any of the photo adjustments displayed on the screen, press Menu, press
|
|
19.
|
To cancel printing, press  Stop/Clear Settings.