- Press
the
 Home button, if necessary.
 - Select Print Photos.
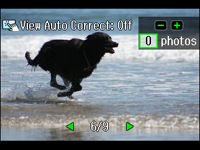
- Select View and Print Photos. You see a screen like this:
- Press
the
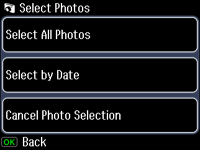
 Menu button, and then select Select Photos. You see this screen:
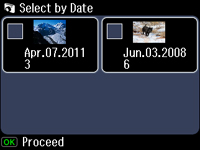
- Select the Select by Date option. You see a screen like this:
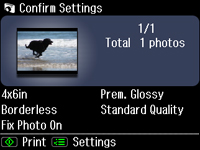
- Press the OK button to see a preview of the photos that will print. You see a screen like this:
- Do
either of the following as necessary:
- To change any
of the print settings displayed on the LCD screen, press the
Menu button, select Print Settings, and select the necessary
settings. When you are finished, press the OK button.
- To modify any
of the previewed photos, press the Menu button, select Photo Adjustments, and select the necessary
settings. When you are finished, press the OK button.
- To change any
of the print settings displayed on the LCD screen, press the
- When you
are ready to print, press the
 Start button.