![]()
Reference Guide
|
|
Index |
|
Search |
|
Glossary | |||||
|
|
Contents |
|
Help |
|
||||||
|
|
|
|||||||||||||||||||||||||||||||||
Scanning / Various Scanning Options
Follow the steps below to make settings suitable for scanning documents and photos (reflective documents) in the Professional Mode.
 | Place your materials on the document table. |
 | Placing Photos and Documents on the Document Table |
 | Start EPSON Scan and then select the Professional Mode. For details on how to select the scanning mode, see Changing the Scanning Mode. |
The following window appears.
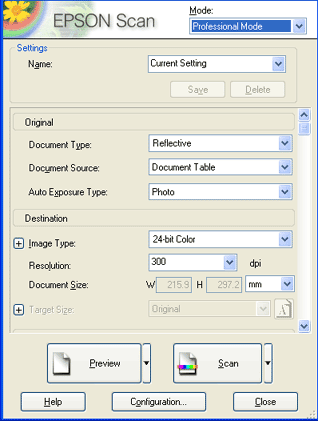
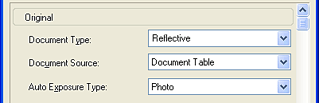
 | Specify the Original settings to match your document. |
|
Document Type |
Reflective |
|
Document Source |
Document Table |
|
Auto Exposure Type |
Select "Photo" or "Document" from the Auto Exposure Type list. |
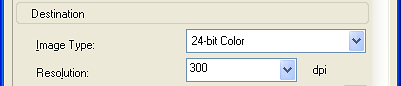
 | Specify the Destination settings to match the resulting image file you desire. |
|
Image Type |
Select a suitable image type from the Image Type list. |
|
Resolution |
Select a suitable resolution from the Resolution list. |
When you specify a high resolution, the number of pixels of the data increases and the scanned image becomes fine in texture. However, increasing the resolution causes the data size to increase. Specify a suitable resolution according to the scanning purpose.
The following table indicates the suitable resolution to use according to the scanning purpose.
|
Purpose |
Resolution |
|
Sending E-mail |
96 to 150 dpi |
|
OCR (Optical Character Recognition) |
300 dpi |
|
Printing |
300 dpi |
|
Filing |
300 dpi |
|
Sending Fax |
200 dpi |
 | Click Preview to preview the images. |
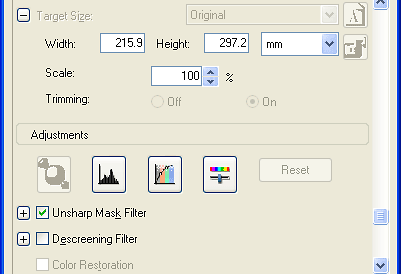
 | Specify the output size of the scanned image as Target Size and make adjustments using the image quality adjustment tools, if necessary. |
 | Click Scan. EPSON Scan starts scanning. |
The scanned images are sent to the application or saved to the specified folder.
| Version 1.00E, Copyright © 2001, SEIKO EPSON CORPORATION |