![]()
Software Reference Guide
|
|
Index |
|
Search |
|
Glossary | |||||
|
|
Contents |
|
Help |
|
||||||
|
|
|
|||||||||||||||||||||||||||||||||
Understanding EPSON TWAIN Pro Features
Making and modifying marquees
A marquee is a frame around an image, or a part of an image. Marquees are often used in scanning and image-editing software to select only the most important part of an image.
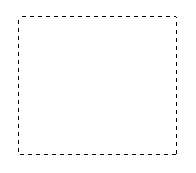
Move the pointer over the image in the Preview window. The pointer becomes a set of cross-hairs. Drag (move the mouse while holding down the mouse button) the cross-hairs over any area of the image, and a dotted frame appears. The point where you first clicked is anchored, but the rest of the frame is sizable and movable. After you finish creating a marquee, you can resize and move it as described below.
You can make multiple marquees in one image to scan the most important parts while ignoring the rest. It is also useful to set several items on the document table and scan all of them in one time. Marquees can be different sizes, and they can overlap. Extra marquees can be made anywhere except on the frame of another marquee. You can make settings on each marquee.
You can begin a marquee anywhere the pointer appears as cross-hairs. To distinguish the active marquee from other marquees, look at the marquee frames. The active marquee has moving dotted line of the frame as shown below. If you created multiple marquees and want to make a inactive marquee active, just point the cursor at the edge of the marquee and click. The marquee becomes active.
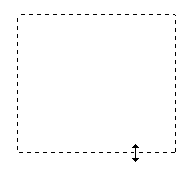
When you move the pointer over the edge of the active marquee, the pointer will change to a double-headed arrow as shown below. You can then resize the marquee to the direction of the arrow is pointing, up, down, sideways, or diagonally, by dragging the arrow. The double-headed arrows only appear on the active marquee.
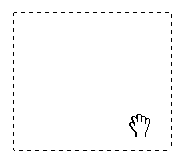
To move an active marquee, move the pointer in the frame of the marquee, and when the pointer changes into a hand, drag the marquee to move it.
| Note: |
|
If you want to create a marquee inside the active marquee, first make a marquee outside the active marquee. The newly created marquee becomes the active marquee and you can move it into the other marquee. |
There are buttons available on the preview window to help you manage the marquees.

![]()
| Note: |
|
You can also delete the active marquee by pressing the Delete key on your keyboard. |
![]()
Clicking the duplicate marquee button while holding down the keys noted in the table below causes the duplicate marquee(s) to appear in a specific direction next to the original marquee.
|
|
Horizontal |
Vertical |
|
Windows |
Ctrl key |
Alt key |
![]()
|
|
|
|
entire preview area |
located image |
| Note: |
|
The Auto Locate feature is automatically activated when scanning without previewing. |
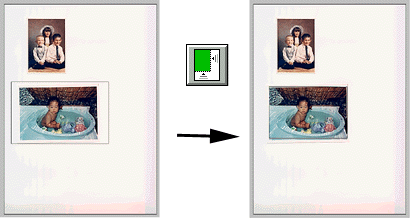
If a document contains more than one image, select a target image by placing the mouse pointer over the image and clicking the Auto Locate button. The selected target image is located automatically.
|
|
|
|
target image and other image |
located and |
![]()
| Version 1.00E, Copyright © 2001, SEIKO EPSON CORPORATION |