![]()
Reference Guide
| Index | Glossary | |||||||||
| Contents | Help |
|
||||||||
|
|
|
|||||||||||||||||||||||||||||||||
How To / Printing on CD-R
Insert the CD-R into the printer as follows. The following describes how to set the 12 cm CD-R as an example.
 | Caution: |
|
|
 | Make sure that the printer is on. |
 | Warning: |
| Make sure to insert the CD-R tray while the power is on. If the power is off, automatic print position adjustment may not be done after inserting the CD-R tray. |
 | Push back the output tray extension. |

 |
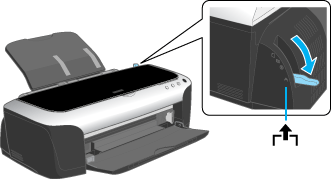
Set the adjust lever to the  position. position.  paper light flashes quickly. paper light flashes quickly.
|
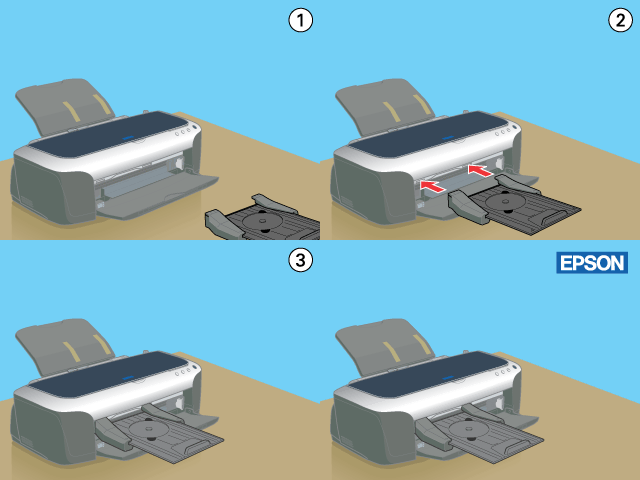
 | Set the CD-R tray to the printer's CD-R tray feeder. |
 | Note: |
| Attach the CD-R tray firmly to the right position of the printer. |
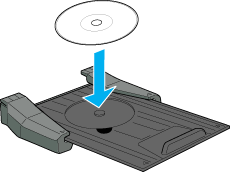
 | Place the CD-R on the CD-R tray with the label surface up. |
 | Note: |
| Place one CD-R at a time. |
|
12 cm CD-R |
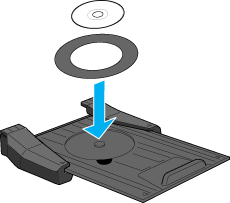
8 cm CD-R Fix the 8 cm CD-R support provided with the printer to the outside of CD-R. |
 |
 |
 | Caution: |
|
|
|
 | Slip the tray to the position that the triangular marks of the CD-R tray join. |
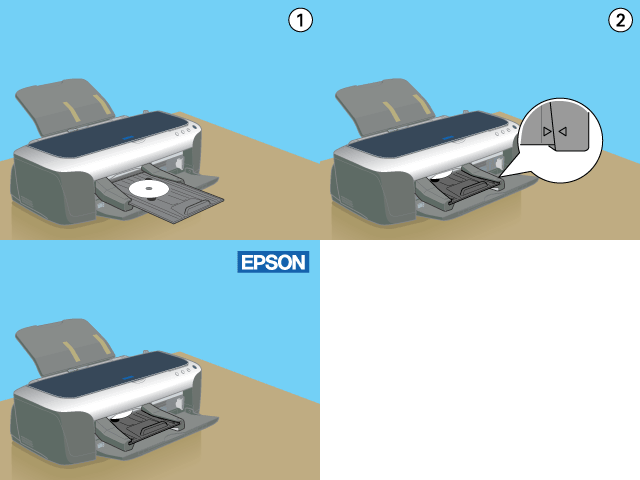
 |
Set the adjust lever to the  position. position.  paper light is turned off. paper light is turned off.
|
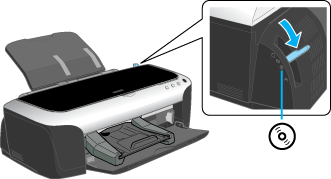
 | Caution: |
Make sure to switch the adjust lever to the  position. If you print in the position. If you print in the  position or the position or the  position, it may cause damage to the hardware. In addition, if the lever is set to the position, it may cause damage to the hardware. In addition, if the lever is set to the  position, the printer will not start printing. position, the printer will not start printing.
|
 |
Press the  paper button. The CD-R tray is adjusted to the proper position automatically. paper button. The CD-R tray is adjusted to the proper position automatically.
|
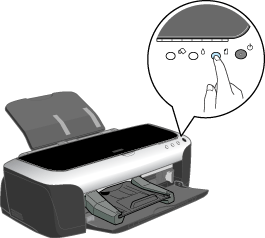
 | Note: |
Press the  paper button again to reset the CD-R tray. The CD-R tray is ejected. paper button again to reset the CD-R tray. The CD-R tray is ejected.
|
 Previous |
 Next |
| Version 1.00E, Copyright © 2001, SEIKO EPSON CORPORATION |