 |
|
|||
 |
||||
Scanning Color Accurate Images
 |
Start Epson Scan, select Home Mode or Professional Mode, select the appropriate scan settings, then click Preview to prescan your image and adjust the marquee. For details, see one of these sections.
|
Home Mode: Scanning in Home Mode
Professional Mode: Scanning in Professional Mode
 Note:
Note:|
You cannot use Full Auto Mode or Office Mode for color management.
|
 |
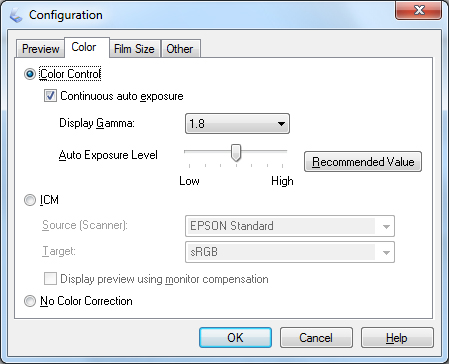
Click Configuration, then click the Color tab and select ICM (Windows) or ColorSync (Mac OS X).
|
 |
For the Source (Scanner) setting, select EPSON Standard. If you have color management software and created a custom ICC profile, select it as the Source (Scanner) setting.
|
Note:|
When creating a custom ICC profile for the scanner, be sure to place the profile in the following folder.
Windows: C:\Windows\System32\spool\drivers\color
Mac OS X: hard disk drive\Library\ColorSync\Profiles
|
 |
For the Target setting, select Adobe RGB.
|
Note for Windows:|
If you do not see the Adobe RGB option, select sRGB.
|
 |
Select Display preview using monitor compensation, then click OK to return to the Epson Scan window.
|
 |
Click Scan.
|
What happens next depends on how you started your scan. See Finishing the Scan for instructions.
Note:|
You can also optimize the color accuracy of your images using a photo-editing application, such as Adobe Photoshop Elements. For help using Adobe Photoshop Elements, click the Help button in the software, see the software documentation, or see Other Software Technical Support.
|