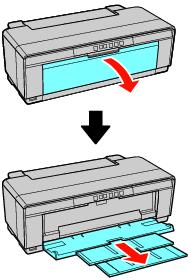
You can print professional quality photos on these paper types in various sizes using the single sheet guide and the rear manual feed slot:
|
4.
|
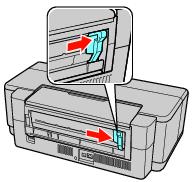
Attach the single sheet guide by aligning the notches on its base with the slots on the back of the printer. Then hook the tabs over the top of the slot (marked with orange triangles).
|

|
6.
|
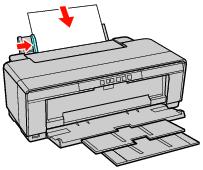
Insert one sheet of paper, printable side up and against the right side, then slide the edge guide against the sheet, but not too tightly.
|
Note:
Load paper short edge first, no matter which way your photo faces.
Check the paper package for any additional loading instructions.
Load paper short edge first, no matter which way your photo faces.
Check the paper package for any additional loading instructions.
|
7.
|
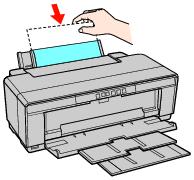
Guide the paper into the printer until it meets resistance and hold it there until the printer pulls it in slightly. Once the printer begins feeding the paper, let go of it.
|
|
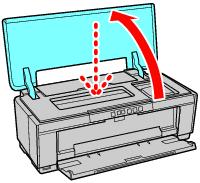
8.
|
Open the printer cover and make sure the paper has fed all the way into the printer and is straight. The paper must feed straight so the printer can properly identify the edge.
|
If the paper is crooked or the front edge is visible, you may receive a paper jam error when you print. To avoid this, press and hold the  paper button for three seconds to eject the paper. Remove the paper from the printer, press the paper button again to clear the paper out error, and load the paper again.