![]()
Reference Guide
| Index | Search | Glossary | ||||||||
| Contents | Help |
|
||||||||
|
|
|
|||||||||||||||||||||||||||||||||
Printing Without a Computer Options
 | Insert the memory card containing digital photo data and PRINT Image Framer data into the printer's card slot. If you have saved or deleted data on the memory card via your computer and have not ejected the memory card from the printer since, eject and reinsert the memory card before printing. |
| Note: |
|
 | Select All, Range, Photo number or Individual from the Select Photo menu. Index cannot be used with PRINT Image Framer data. |
 | Select the type of paper loaded in the printer from the Paper Type menu. |
 | Select the size of paper loaded in the printer from the Paper Size menu. Be sure the size of paper loaded matches that specified for the PRINT Image Framer data. The paper sizes available in the Paper Size menu change according to the Paper Type selected, therefore with certain types of paper the size appropriate for the PRINT Image Framer data may not be listed. |
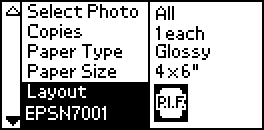
 | Select the desired PRINT Image Framer data from the Layout menu. The PRINT Image Framer data file is displayed. PRINT Image Framer data is located at the bottom of the Layout menu. |
 |
 |
 |
| Note: |
|
 | Specify the photos that you want to print and the number of copies of each using the Select Photo and Copies menus. |
 | Press the Print button to start printing. |
 Previous |
 Next |
| Version 1.00E, Copyright © 2001, SEIKO EPSON CORPORATION |